
Bread Baking: Introduction

I've never done a course, or had a baker in the family. Yet, with little more than a willingness to learn and get my hands covered in dough on a routine basis, I've baked a lot of bread that I'm proud of.
I've been baking breads for over a decade and this is just the tiniest sample of some of the bread and bread-like items I've made.
- Top left: "Poolish Whole Wheat Ciabatta".
- Top middle: "Basic Rye Loaf"
- Right: "Same Day, Non Poolish, Non-Prefermented French Baguette"
- Middle Bottom: "European Peasant Bread"
- Bottom Left: "White flour cracker puffs"
- Centre: "Rustic Poolish Freshly Milled Hard Winter Wheat & Rye Bread".
I hope this inspires you to try bread baking. It's an amazing journey that has many potential destinations and side attractions too!
I started with some very humble beginnings...
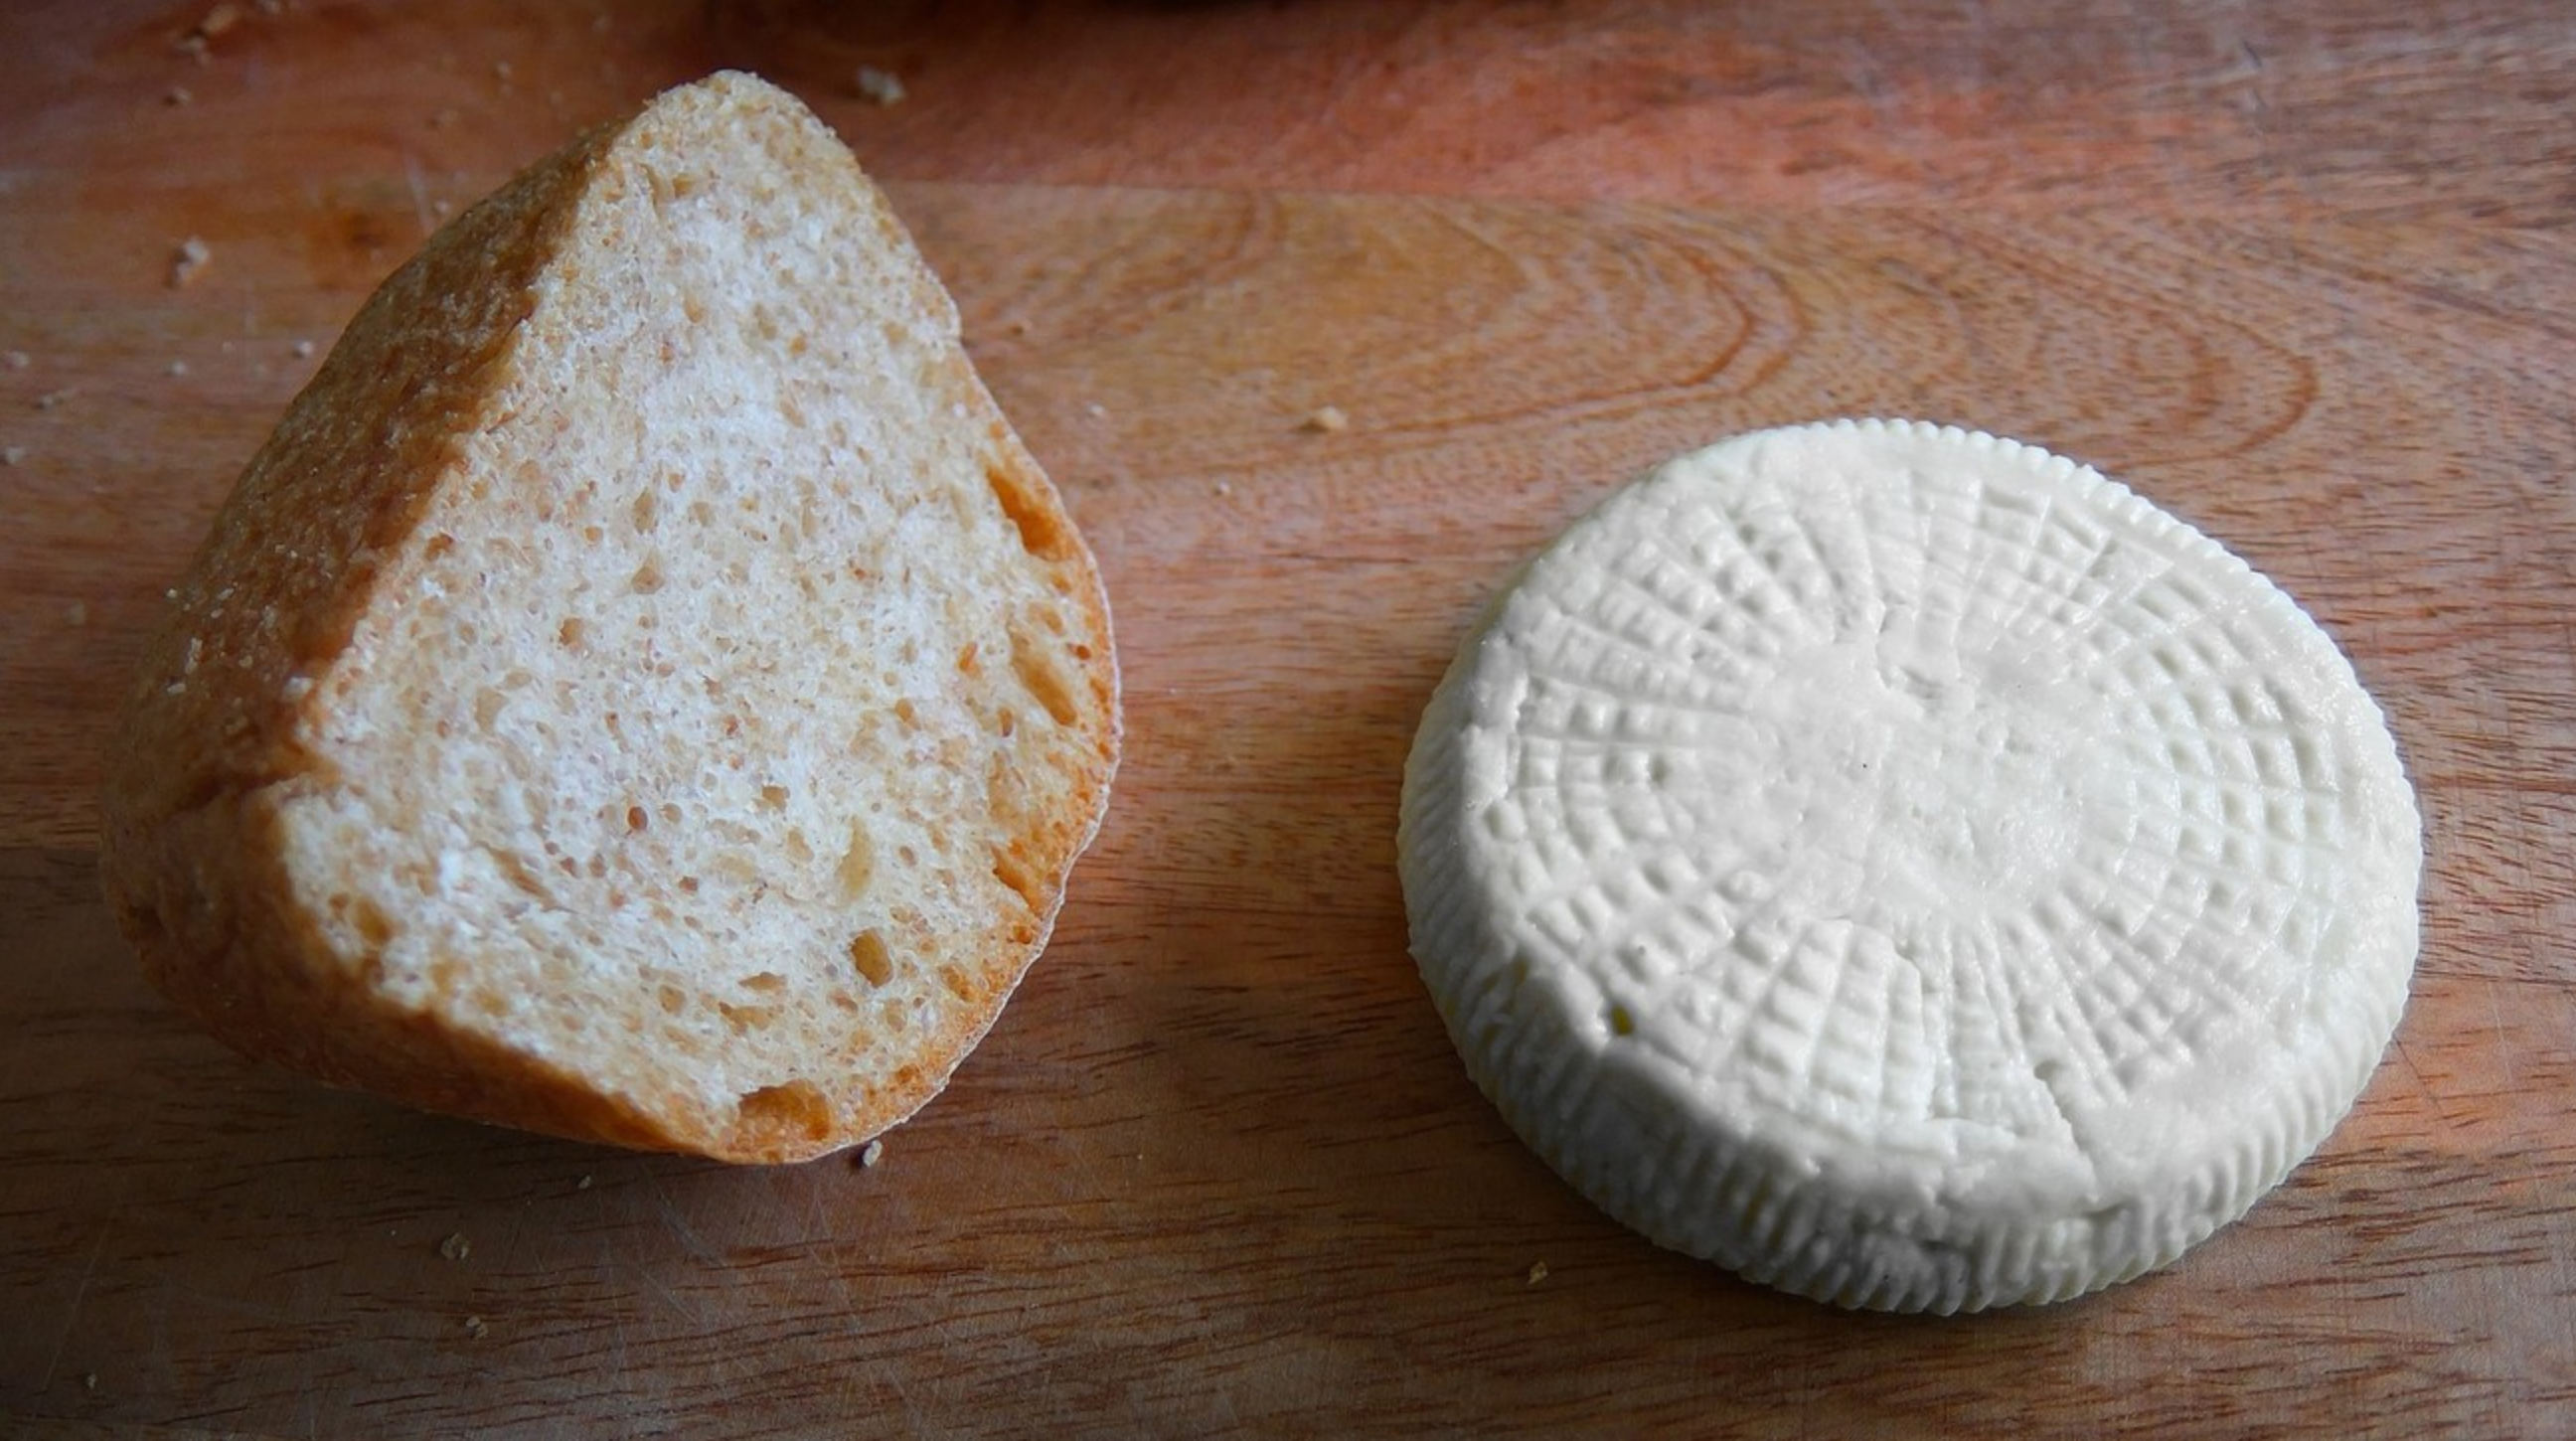
In fact, I was more of an aspiring cheese maker in the beginning, and the bread making was just a means to not gnaw on my wheels of cheese like the long-lost link to our loosely-related Australopithecus ancestors. Let's call them "twice-removed"... or more... there's some controversy on where we are relative to them in the scientific classification).....
Let's just say I didn't want to embarrass anyone who watches me eat my cheese, ok? Bread seemed a socially acceptable and logical addendum to my cheese addiction. :-)
Bread baking is one of the things I just love to do. I don't always have the time I'd like to do it, but it's a skill well worth learning. Nothing beats the smell of freshly baked bread in the kitchen... except the taste of course.
Learning to make bread isn't necessarily "hard" However, it may seem confusing when there are so many sites and books on the subject. It's easy to sucked down the "rabbit hole", of technicalities, equipment, and ingredients. I'm not going to lie, you'll probably end up going down that rabbit hole at least to some degree. Many bread bakers collect bread related stuff... and over the years I've collected an extensive library of books on the subject. The reason I chose to buy so many books isn't because it's hard, but because bread across the world has so many varieties. Even the historically colonial countries who've adopted (usually European) bread styles have adapted it to regional tastes.
Some of the more famous national varieties include:
- India has naan, kulcha, roti and dosa.
- England has crumpets, English muffin, and scone.
- Egypt has "aish merahrah",
- Madagascar has "mofo gasy" (no that's not rude, mofo means bread, and gasy is short for Malagasy which means "Madagascan") Yes, it's name really is, at the end of the day, "Madagascan bread".
- Japan has nanpan, shokupan, cream pan, and melon pan amongst many others. (NOTE: pan just means bread and comes from the original Portuguese missionaries word Pão... who brought bread to Japan. It's also interesting to note that traditional melon pan tastes nothing like melons, it just looked like a melon at some point... although modern versions are now sometimes flavoured to be like melons, most aren't. Similarly, cream pan does often contain a creamy filling, but the bread has been tailored to suit Japanese tastes... so like many of these filled breads, they have a distinct flavour of their own)... It's easy to assume they're talking about the fillings alone, but that's not always true, and the flavour of the bread itself often changes from one Japanese region to another.
- Italy has panettone, ciabatta & focaccia,
- South Africa has "sweet corn bread", "beer bread", "pot brood", and "vet koek".
- Austria is famous for Vienna loaves,
- Mexico has "Pan de Muerto", bolillos, tortilla and fajita,
- China has laobing,
- Bolivia has cunape,
- Australia has the classic "damper".
- Mali has ngome. (please note that's not a typo of gnome).
- Morocco has Khobz,
- Puerto Rico has "Pan de Agua" (Peurto Rican Water Bread), and Pan Sobao (a french-styled bread that uses lard, or vegetable shortening if you're of a vegan persuasion, to make the bread softer).
- Slovenia has Krompirjev Kruh (a potato based bread)
- Spain has "Pan de Leche" (a sweet milk bread).
- Switzerland has "Wurzelbrot" (One of the most fun names to say... named after tree roots, which this twisted bread can resemble, is proofed overnight in the fridge, and so this slow made bread naturally converts starches into sugars which when baked adds some pleasant and complex flavours)
- Turkey has Lavas, along with it's own "Turkish" bread, known across the world.
THE COUNTRIES WITH THE DISCUSSED BREAD TYPES:
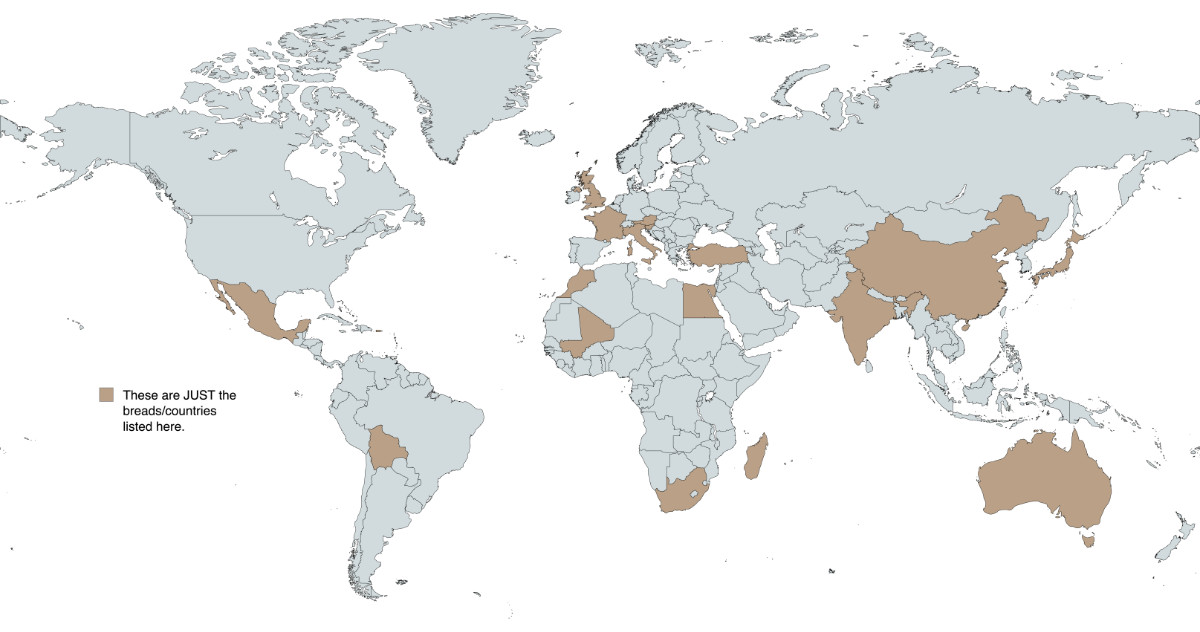
Whether you like the flat breads or raised breads, breads based on nuts, corn, wheat, maize, or some other grain, white versus dark, sweet or savoury, light and airy versus dense and heavy, a crunchy or soft crust, thick or thin crust pizza bases, (let's face it, that's bread too) there's a bread type to suit almost anyone.
While the basic bread is simple as far as ingredients go, making great tasting bread is truly an art. Of course, you can get tasty bread from almost no fancy equipment, or even a lot of expertise. People make bread this way in many places across the world every day. Alternatively, you can buy yourself a bread maker, throw the bread mix in with the right amount of water, and you will get a preservative free, freshly baked loaf of bread. But with a little time, experimentation, and a willingness to get your hands covered in dough, you'll quickly learn to make substantially better bread that's actually more healthy for you.
So what's in bread anyway?
Well that's a very loaded question. One of an ever-growing debate that should continue as pressures to make affordable, shelf-stable bread that will feed millions every day rises. You see, if you are in the habit of buying commercially made bread from your average supermarket, and look at the ingredients, you'll find all manner of ingredients. While many folks obsess about:
- preservatives,
- colours,
- flavours and enhancers,
- and how most of the above are masked under various colour and flavour codes, scientific names, and marketing "spin".
...There's always a rational reason to put them into bread. If you want your loaf to last days on end... it probably has some sort of preservative. If you like the softest, whitest bread, you can bet there's some highly processed flour, and probably other additives to get that results. (Oils, lards, milk... can soften bread... but there are many ways to do it). I think it's too easy to demonize large scale/low-cost bakers who provide a product built to a price point and certain tastes/shelf lives. That said, large scale, commercial bread isn't "the best" by any means, but it's enough for many.
Aren't you tired of people on their soap box?
I sometimes wonder how "influencers" and other opinionated folks online attract so much interest/followers as they rail against the "additives" and "corporate interests" while shamelessly not discussing the simple act of taking personal responsibility for our purchasing choices. If you aren't paying attention, if you aren't reading the labels, and if you aren't monitoring your eating habits... then who's really at fault for the quality of food? Now if there's some major quality control/contamination issue at the bakery... that should be raised in the interest of public safety.
That said, there are times, that it honestly scares me what gets put into foods these days, and having food scientist friends, the stories they tell me about chemical treatments making even fruit and vegetables last 6 months to a year on the shelf means that healthy foods are not only harder to find, but harder to even identify. I want greater control what goes into my food. That is one of the main reasons I got into bread baking, and growing my own foods. I don't do wheat (I don't have that much yard space) but I preserve a lot of fruit, herbs, and vegetables which end up in my bread-like foodstuffs.
The home made approach:
Fresh, home made bread is usually comprised of a handful of ingredients, (seeds/grains, flour, water, yeast, and salt). Flour can be made from almost any grain, even some nuts, so if you have gluten tolerance issues in your family, you can swap it out for gluten free alternatives. If you do change the ingredients, you may need to experiment a little to tweak the recipe to cope with the change.
Note that because your bread doesn't have preservatives in it, that it will not last as long as many commercially made breads. I find mine (depending on the weather, and the moisture content of the recipe) can last between 3 and 5 days. However, in my home, a loaf of freshly made bread often struggles to survive the day it's made... especially if we have guests.
If 3-5 days sounds too short because you don't eat that much bread, there's no reason why you can't just make a batch of dough, and cook smaller loaves as needed. You'll need to adjust the recipe according to the time line. There are whole books dedicated to "make ahead" bread types, and I'd strongly encourage you to try them if you're short of time through the week. Alternatively, I often make a few loaves at a time, and then slice and freeze them as a backup loaf.
Where does the artistry come into bread making?
Making world-class, professional bread is a task with many variables. These variables not only relate to your choice of ingredients, but to the process itself. Some might include:
- The type(s) of flour, (you don't have to limit yourself to just one)
- the moisture level, (which comes down to the recipe and accuracy of your measurements of the ingredients),
- the temperature of ingredients at every stage of the process,
- ambient temperature and humidity of your kitchen,
- the method of mixing,
- the extent of mixing,
- proofing times,
- "punch down",
- additional ingredients (seeds, fruit, nuts, herbs, etc)
- the kneading and shaping process,
- whether you slice your dough to allow expansion, dust it with flour, or glaze it with water/egg/milk/syrup,
- whether or not you use steam when baking, and of course,
- the cooking times/temperatures.
No need to panic!
While all of the above sounds really scary. The truth is that bread making can be as simple or complicated as you like. For example: I've cooked Australian damper bread using nothing more than a stick over an open campfire. The dough was made with bread flour, salt, and water. I just wrapped the dough around a stick and baked it near the fire. You probably have access to much more ingredients and better cooking methods than that.
There are plenty of good bread making videos online, as well as web sites. One the sites I found particularly inspiring/informative, is the Bread Kitchen found at
Here is the introductory video outlining the cheap equipment needed for bread making:
There's a lot more videos, but you can go through all of the basic videos in an hour or so.
I've never done any official bread courses, and this is what I can accomplish on my first try of a new recipe...
Ham's Top Tips For Bread Making Success:
- Note your baking down. What you used, which recipe/method, and any adjustments you made. Then take a photo of the end result with your phone. Keep it in a book so you learn what works, what doesn't work, and whether or not you liked the bread in question.
- While you can use cake flour. It's better if you use bread flours. Bread flours can be found in supermarkets, health food shops, and if you're unsure, you're usually looking for gluten/protein content percentages above 13%. Many countries have their own grading system of flour. France has a "T score" system, depending on the intended recipe. T45 is for pastries/cakes, T55 and T65 for white bread, T150 for wholegrain bread. (Avoid T130, as the rye is particularly challenging for beginners, it's meant to be an additive (usually less than 20% of flour) to a predominantly T55 or T65 mix).
- Make your life easier by using fresh flour! Don't use that stuff that's been sitting on the shelf for months/years. Same with yeast.. if your yeast has been sitting around the back of the cupboard since the phones were wired, "Millennial" wasn't a common term, and one of the "Bush's" were president... it's time for you to let it go, and get some new stuff.
- Weigh your ingredients rather than using cup/teaspoon/measuring jugs, as volume based measurements are often inaccurate. So buy yourself a kitchen scale if you don't already have one.
- Plan out your bake. Bread making isn't all that time consuming if you plan. There are plenty of times you just need to wait for the dough to rise, rest, or bake. You're not actually doing anything at these times. However, if you're constantly worrying about it, (most beginners do) you'll find the process is very time consuming and can take all day. As you get more experience, you'll find that just leaving it alone can render equal, or even superior results.
- Resist the urge to add more flour and/or water until the dough is well and truly combined. The number of times I messed up the recipe because I thought the mix was "too wet" or "too dry" and tried to compensate. It's the end result that matters. Similarly, if you're kneading by hand, make sure you don't continually add extra flour to your work surface and work it into your dough. Some doughs are meant to be sticky and a little bit "gooey". Don't assume that they're all meant to have the same consistency, or even texture.
- This sounds contrary to points 4, 5 & 6, but when you're doing any "proofing", and they suggest leaving it for a certain amount of time or until it's "doubled" or "tripled" in size.... the specified time is less important than the doubling/tripling in size. You'll be much better off delaying the next stages until you've seen that dough expand. If you're worrying about over-proofing it, stick it in the fridge and leave it until later in the day... or even overnight until a suitable time the following day. It'll be slower, but that doesn't matter. Baking an underproofed dough will be dense and not be anywhere near as good.
- Expect things to stick in bread tins, or on cooking stones when you're starting out. Baking paper is my preferred method for avoiding this issue. Spray a little oil onto the tin and stick the paper to the sides. Feel free to cut your paper to shape, and avoid those wrinkles which makes for wrinkled loaves. Personally, I just use a pizza stone for most of mine, or the inside of a cast iron cook pot (some people call them "Dutch ovens"). Just make sure everything (handles especially) are oven safe! (Not plastic).
- When cleaning mixing bowls, and other dough coated utensils, clean them promptly! Dried out dough makes cleaning so much harder than necessary.
- Hate kneading? Consider using a kitchen mixer. However, be aware that cake mixing is much easier than bread/dough mixing, so low-powered mixers (even the "Artisan" series of Kitchen Aid mixers) may struggle. Also, do NOT be tempted to use the usual cake mixer attachment as it will NOT work. You want a "dough hook". However, they're not all equal. My Kitchen Aid came with an enamel-coated dough hook, and it works, but when Ren complained about its lack of "dishwasher safe" status, I bought the stainless steel model. The stainless model seems to place a little less stress on the motor, and can be tossed into the dishwasher, has been dropped on the tile floor, without any fear of "chipping the enamel". In short, the stainless gear will outlast me. Consequently, I think all attachments should be made with stainless steel and just forget enamel ones entirely.
- Accept that you are going to make a mess, and there will be both triumphs and set-backs. Even if your bread doesn't rise, you left it proofing too long and it developed massive bubbles (or holes) in your sliced bread.... or you burned the crust a bit... it'll still be very tasty.
- Be proud! By attempting to make bread, you're going to make something more than 80% of the world has never tried. Be willing to give it a go, and find time every now and then to practice. It's great to involve kids, (the dough is 90% of the way to play dough), and outsource some of the hand kneading. If you have kids that are a bit older, ask what they do and don't like about the bread, and tweak it.
Ideas for going further (to keep bread making interesting):
- Drop some dried fruit into it (diced dried apricots, dates, sultanas, etc) make for a much more amazing fruit toast! However, give it a little longer to proof to deal with the additional weight the fruit adds).
- Alternatively, adding minced/diced garlic can create an amazing garlic-infused bread.
- Try adding grated beetroot for interesting colours, a little extra sweetness, and a delicious/healthy alternative.
- Many people have heard of banana bread, some have even had pumpkin bread, but have you had mango bread? Perhaps pear and cinnamon? If it goes well in a muffin, you'll probably find that it goes well with bread. It's just a sugar-reduced/more savoury option.
- Add spices, like all-spice, caraway, cinnamon, & nutmeg to taste! Perhaps herbs like rosemary and sage.
- If you're making pizza bases, try adding basil, diced sun-dried tomato, and a bit of finely diced garlic into the dough.
- Have a crack at flat breads, naan, tortillas, fajitas, etc, to make home made wraps. (Freeze pre-made burritos for an easy snack).
- Have a go at making simple pastries. (I recommend choux pastry for profiteroles, it's surprisingly easy, (once you get that texture right) and then you can fill it with melted chocolate-infused cream, or even custard... dip half into melted choc for an easy and professional finish).
- Try different types of flours. There are places in Australia to import both French and Italian flours. This makes quite a bit of difference in some types of bread, while very little in others. Organic stores like "The source" offer a wide variety of flours, meals, seeds, and even fresh yeast to add to your mix and increase flavour.

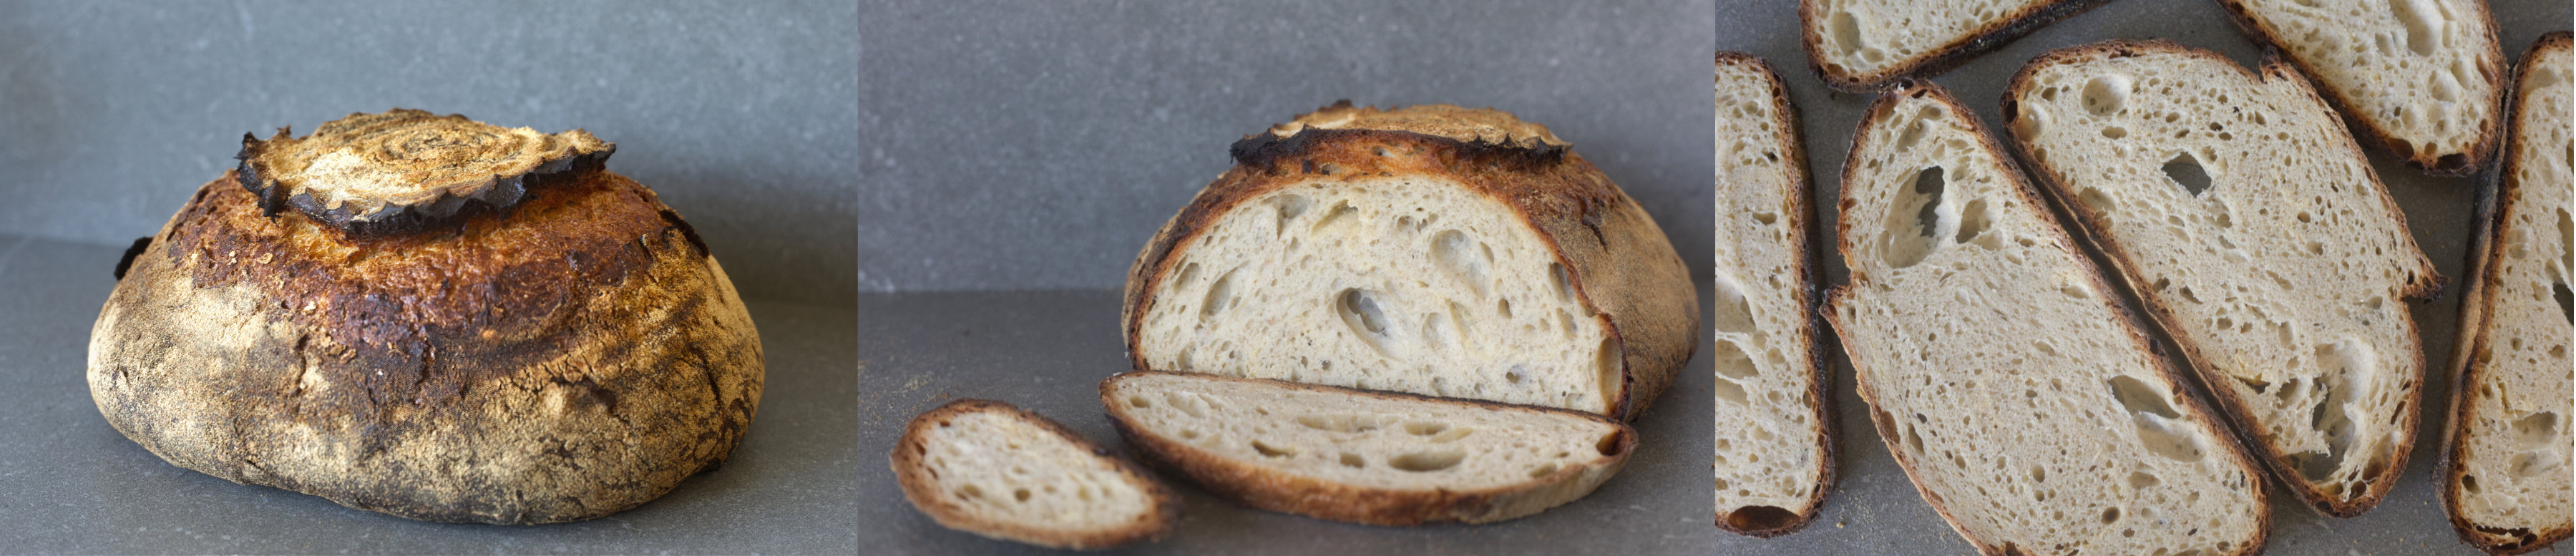
Here's a pizza-stone cooked loaf of bread, fresh out of the oven. Without sides to support it, the dough needs to be a little thicker.... unfortunately it didn't quite rise as much as I expected... only 10cm or so... but that's half the fun of making bread. However, the middle slices are going to make for an impressively long, foot long sandwich... I'll use a far better filling than Subway seems to put in it's (in)famous offerings. I'm thinking either home made, smoked salmon, or thick cut smoked bacon, home grown salad with a home made relish/sauce, and some grated home made Gruyere, Cheddar, or Pepato cheese.. from my other home-made foodie obsessions.

Try making Pretzels!
There's no reason you should limit yourself to boules, baguettes, & loaves!
If you like store-bought pretzels even half as much as I do, you'll adore the fresh, home made ones even more.
Feel free to make it gluten free, bake it darker for more flavour, or lighter for a softer crust, adjust the salt levels to taste, or incorporate seeds, herbs, or even dried garlic into the dough!

Extend into sweet treats!
Want to get a "little bit fancy?" Well if you can master the art of rolling your dough into thin rectangular sheets, coat it in your sweet treat of choice (cinnamon sugar/jam/etc), fold into layered doughs, cut into strips, braid and roll into a muffin tin...
You get this!
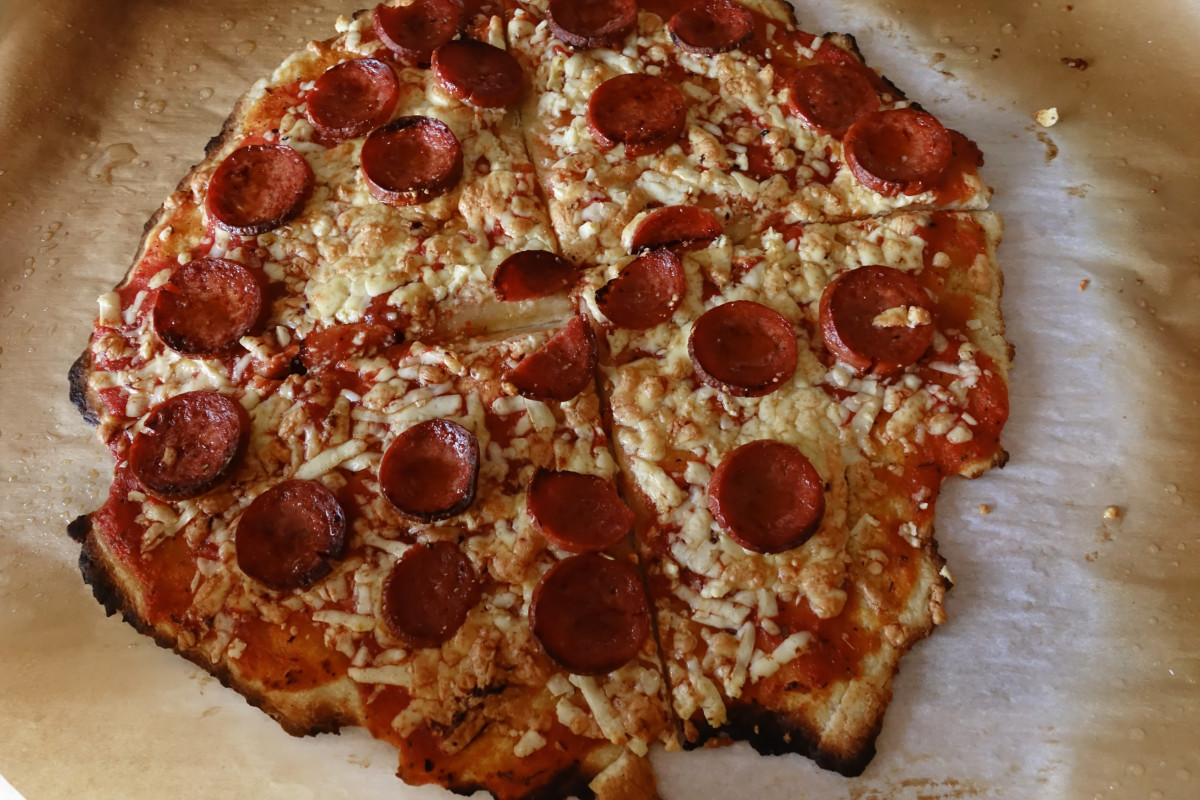
Try flatbreads!
There's a whole range of breads in the pizza and flat breads section. I mean come on pizza is practically it's own food group!
Why stop there?From tortillas, fajitas, naans, even Turkish pide or Italian calzones... and that's not even covering pancakes, crepes and waffles!
Experiment!
There are scores of grain varieties and alternatives like seeds, nut-based flours, and that's not even starting to cover every fruit/vegetable/herb/salt variety you can add into the mix.
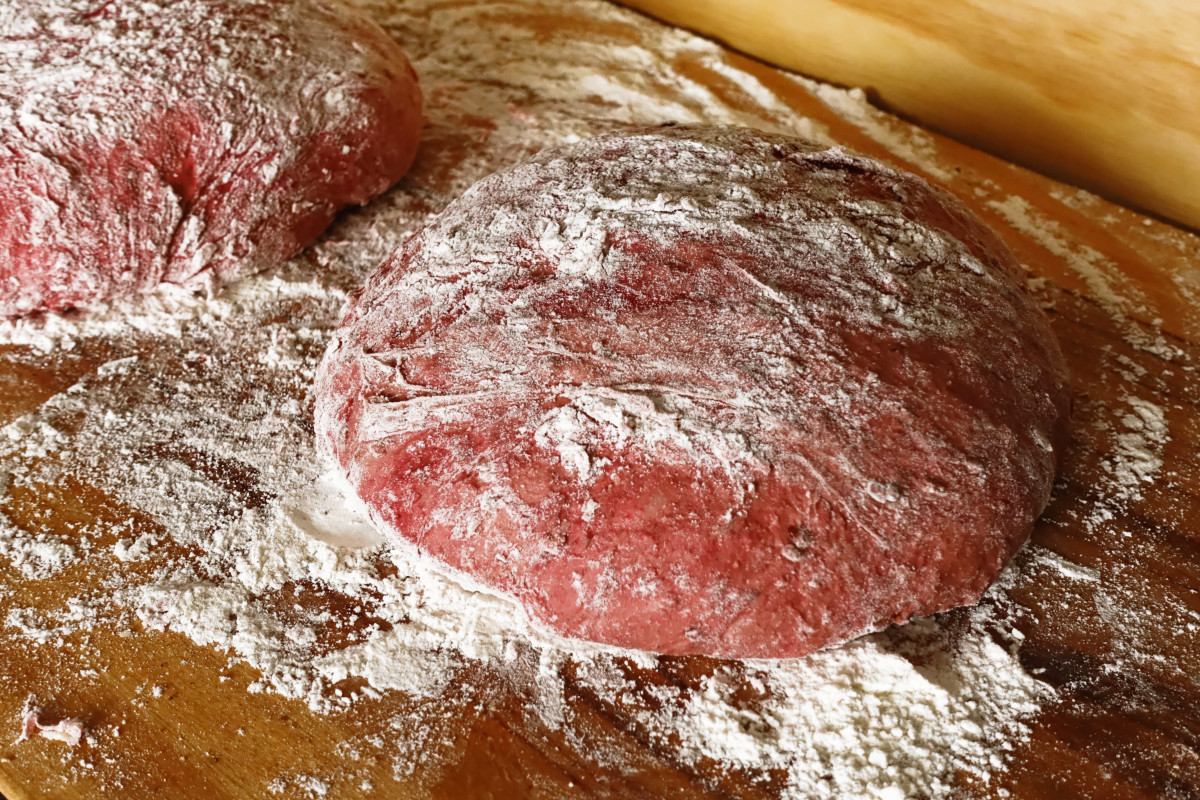
Why not go crazy and try a beetroot bread like I'm making here?
I'm warning you now... when you start making food the way you like it... not only will you enjoy eating it more, you'll start learning about other types of food.. and it's a slippery slope from there. Then the kitchen will be a place of wacky creations, and an unending torrent of deliciousness and mess. Don't be surprised when people start asking you to bring something you've "thrown together" (as if you would just throw it, when you can skillfully engineer wonderfully tantalising food stuffs).
Heck, I'm the most uncoordinated guy I know, and I've made plenty of dough infused messes.. but anyone can learn this with enough practice. Here's where a little knowledge and practice gets me... the recipe can be found below:

Ham's "Go To" Bread Recipe.... (a tweaked variant of Brian Lagerstrom's recipe)
Tools/Equipment:
- Large mixing bowl
- Kitchen scales
- Flat surface to shape loaves on
- Clean tea towel (not the furry/terry/fuzzy kind)
- Dutch oven (Check it can handle high temperatures, and handles are not plastic). A cheap 5L or larger model is better here.
Optional extras:
- Dough whisk (nice to have for hand mixing in earlier stages, but not essential if literally mixing by hand).
- Stand mixer with dough hook (faster, but does not give you a "feel" for dough)
- Banneton/Proofing basket (replaces tea towel with a nicer option)
- Cast iron loaf pan (Brunswick, Skitchen, or Challenger brands are the ones I know about... but these can be very expensive... but may be cheaper than fancy high end dutch ovens like Le Crueset/Chasseur which have official max-temps of only 230C or so)
- Spray bottle for water.
INGREDIENTS:
Poolish (make the day before baking):
- 150g warm water (see method for tips)
- 150g of bread flour/all purpose flour.. personally I like to use French T55/T65 flour if you can get it.
- literal pinch of instant yeast
- 4-24 hours of fermentation time. (More time = more flavour.. if you're short on time, add a little more yeast and give it as much time as you have).
Dough:
- All of the Poolish preferment mix.
- 280g water... warm to somewhere around body temp (37C or 98F)
- 2g yeast
- 350g all purpose/bread flour (or 400g if your don't have any whole wheat flour, listed next... I often use 375g bread flour, with 25g of rye meal if whole wheat is hard to come by)
- 50g whole wheat flour
- 10-12g salt (PREFERABLY NOT IODIZED, BUT USE WHAT YOU HAVE)
Optional extras:
- Soy/Linseed/Flaxseed mix
- Pumpkin seeds
- Finely diced dried fruit (I like cranberries, dates, sultanas, blueberries) and cinnamon when making fruit toast. How much?... well anything between 50g and 150g of fruit and a tablespoon of cinnamon works... although as you add more, the bread doesn't rise as much, given the extra load. Dice fruit into sultana-sized bits... no need to make a purée here.
- Finely diced/minced garlic, or even dried garlic.. and even add a tablespoon of dried thyme for an amazing garlic/herbed bread (add more butter and garlic in the usual way once the bread is baked as well... just don't make it on first dates :-P... Unless you know they're really into garlic)
DAY BEFORE BAKING: (15 mins total work)
INITIAL "POOLISH" (High hydration pre-ferment)
- Pour 150g of water from the tap and let it stand for 10 minutes. This allows any chlorine from the water to slowly be released from the water. (Tip, if you have a kettle with some water that's already been boiled and cooled down, you already have it!)
- While waiting for the water to stand, pour 150g of bread flour (or any flour with 10-13% protein) into a large mixing bowl.
- Add a pinch (literally) of instant yeast (or fresh if you have it) I've put in as much as half a teaspoon, but this is unnecessary.
- Mix the water into the flour and yeast mix. Try to eliminate clumps of dry flour so it's all nicely and smoothly combined. It'll look like a really sticky/runnier dough (also known as a shaggy dough). We don't care about anything else other than getting it mixed at this point. If you don't have a mixer, use your (very wet) hands to pinch any clumps and mix it up. (NOTE: Wash hands thoroughly, then dry them, to stop anti bacterial hand wash from killing your yeast, then saturate your hands to stop dough from sticking to your hands while mixing, reapply water to the hands as needed).
- I cover my mixing bowl with a flat chopping board/plate instead of using cling film (but you can do this too). Leave to stand (preferably somewhere vaguely warm or at least 20 celsius or 68F) for between 4-24 hours... I recommend overnight at the very least. This helps to enhance the flavour.
- Prepare at least another 280g of water by either allowing to stand (or boiling it and allowing to cool down in a container..... don't leave it in the jug or your tea/coffee drinking partner will use it up for her morning cup.. and you'll have to improvise... at least, that's how it worked for me).
DAY OF BAKING: (45 mins active time, 4 hours total)
- Open up your "Poolish" mix made yesterday, measure and add 280g of water (preferably warmed to about body temp), and stir it in to make a runny mix. This helps to infuse the poolish with the dry ingredients added in the coming steps.
- Add
- 2g of instant yeast,
- 10g of salt (preferably non iodised, but any will work),
- 350g of all-purpose flour... or better yet, bread flour (or adjust to 400g if you're skipping the whole wheat flour coming next)
- 50g of whole wheat flour.
- You can use a stand mixer with a dough hook on low for 2-3 minutes... but if you're doing it by hand, wet your hands once again like mentioned above, and squeeze any clumps between your fingers until it has a smooth consistency. This should only take about 3-5 minutes.
- Cover the mixing bowl once again, and leave somewhere warm-ish for 30 mins.
- With one hand holding the bowl, and one wet hand/wrist, scoop up the edge of the dough, raise/stretch it, and carefully fold it over the top, to the other side of the dough. Turn the bowl 60-90 degrees or so clockwise, and repeat the scoop, stretch, and fold process about 6-10 times... when you feel resistance and it doesn't want to stretch much more, stop. You should notice it looks more like a ball of dough than a puddle/batter.
- Leave covered for another 30 minutes.
- Repeat Step 5. Then leave for 1 hour (60 mins)
- On a floured surface, place your somewhat "slack/gooey" dough on top.
- Before you shape the dough, clean and line the mixing bowl with a clean (not fluffy) tea towel, and flour the towel's surface. Or prepare a banneton/proofing basket if you have one.
- Back to the dough, pull the dough out on the right side, stretch it out, then fold it over to the far (left) side of the dough. Mirror that with the side closest to you, the left, and the side furthest away. Do all four directions at least twice each, then continue to shape the dough into a ball, tucking all the joins underneath so you can't see the seams. If it doesn't sit like a ball, give it some more stretching and folding. When you have a seam-free ball...
- Grab your dutch oven, (ensure no handles are plastic) and shove it into the oven and pre-heat to 260 Celsius (500F) with lid on top for pre heating.
- Place the dough (seam side up) into the pre-floured, tea towel lined bowl and leave it on the bench for 45 minutes after a light coating of flour.
- Grab baking paper/parchment, cut it a length that can go down one side of your dutch oven, across the bottom and up the other side.
- Place the paper on a flat surface, and tip the bowl/dough upside down onto the middle of it.
- Pull the dutch oven out of the oven, and use the baking paper to gently lower the whole dough, paper into the dutch oven.
- Spray some water onto the top of the dough, then using scissors, cut a 1cm deep cut across your dough, then place the lid on top.
- Put into the oven, and lower the temp to 250C (482F) and bake covered for 18 minutes.
- Remove the lid, and bake for an additional 25-30 minutes... depending on the preferred colour of crust. I recommend that you bake to a dark brown, but not black, this will enhance the crust and flavour quite a bit... but if you prefer a lighter softer crust, I'd consider cutting it down to 23-25mins.
- Remove from dutch oven, and place on a cooling rack for at least 30 mins before cutting into it.
- Enjoy!
Need additional guidance? Here's Brian's original video:
Brian Largerstron's "One Dough, Three Loaves"
Enjoy!
Ham.