It may seem like a redundant thing to do. Bacon is easily obtainable from shops, so why would anyone make their own? My reasoning is: "Because it's amazing".
It's almost unreal. That bacon, perhaps the most beloved form of cured meats, is really easy to make. Easy enough, that I generally make anywhere between 4-12Kg at a time, so I'm ready for unexpected visitors, barbecue events, "just 'coz", or the Kosher apocalypse.
Ready for the broad strokes on dry curing some bacon?
You need:
Equipment:
- Kitchen scales.
The more accurate, the better, but I've gotten along ok on my typical kitchen scales with a minimum increment of 2g. It's probably best if your scales can handle 1-10Kg at a time. - Zip lock bags, or vacuum sealer. Make sure that whatever you use, it does not leak. You'll be effectively curing/brining the meat in its own juices. If you lose the fluids things won't go well.
- Baking dish/oven tray: I generally use this to give something to support wide slabs of meat while measuring it on the scale.
- Small bowl for measuring cure out.
- Oven/Meat Smoker/Barbecue.
- Meat Thermometer (or barbecue controller if you're getting fancy)
Ingredients:
- Pork: I say pork for ease of comprehension. However, there are other forms of meat being used to make bacon these days.
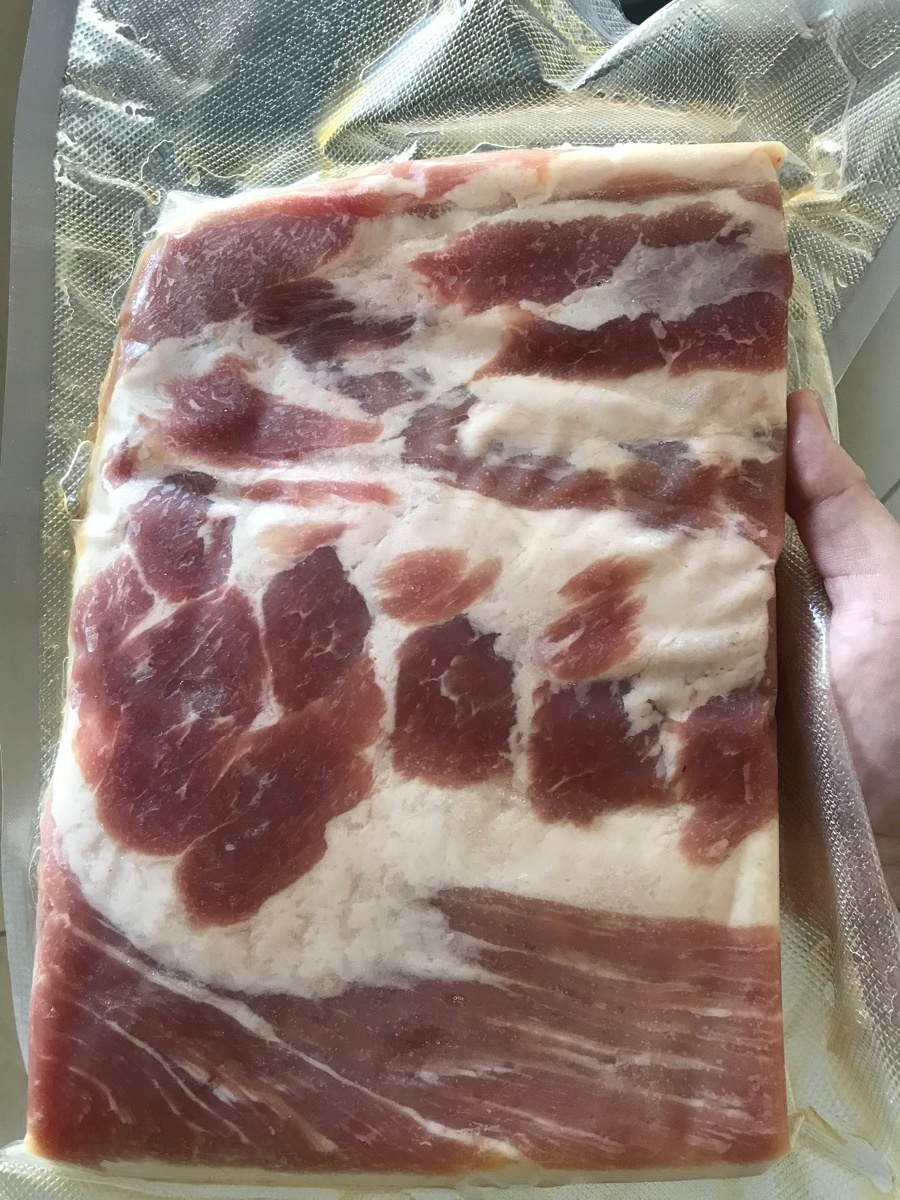
- If you like streaky American style bacon, then you'll want pork belly. If you want a slightly less fatty option, you can change the cut to sides or back. Ask your local butcher for advice. However, bacon can be made from other parts of the pig if you wish. Some people insist that you must leave the rind on, however, I find that the curing works better if you get your cut with the rind removed. Up to you!
- Cure (Salt with more salt, and occasionally, extra flavouring)
- You can buy pre-made curing mixes. I buy mine in "Maple Bacon Flavour" from: https://www.smokedandcured.com.au/misty-gully-maple-bacon-cure-1kg/ or you can make your own. Now please note that many curing mixes contain a small amount (usually less than 1%.. often somewhere around 0.85%) of sodium nitrite which is a salt, but a salt that is toxic in very small amounts. It's important that you measure out these cures accurately for the weight of the meat you're curing.
- If you're wondering "How dangerous is it?" and "How do I tell the difference between the salts?" The people who make cures that do contain a small amount of Sodium Nitrite (which is completely different from Sodium Chloride, also known as everyday "table salt") are required by law in many countries to list this in the ingredients. Sodium Nitrite is potentially lethal to adults with a dose of just 2.6g. Before you panic, lets do some maths here:
- Once again, it's important that you realize that many cures are 95% (usually more) normal salt, with a small amount of the dangerous stuff mixed in (lets say 0.85%). Furthermore, when you only use (40g of the mixed cure per 1Kg of meat) , the amount of actual Sodium Nitrite that's put on each kilogram of meat is just 0.34g. Ignoring the important step of washing off the excess cure (that comes next) you'd need to eat roughly 7Kg of unfinished bacon to die. (No one wants to eat unfinished bacon, it's just so darn unpleasantly salty) Washing the excess cure off, soaking the meat, and then cooking (which forces both liquids and a little cure out in the process) means there's even less sodium nitrite.
- If you're wondering "How dangerous is it?" and "How do I tell the difference between the salts?" The people who make cures that do contain a small amount of Sodium Nitrite (which is completely different from Sodium Chloride, also known as everyday "table salt") are required by law in many countries to list this in the ingredients. Sodium Nitrite is potentially lethal to adults with a dose of just 2.6g. Before you panic, lets do some maths here:
- If you don't like the idea of using Sodium Nitrite, some recipes will suggest that you only need "Kosher salt". Firstly this salt is not going to make any amount of pork "Kosher". It is really just another name for your run-of-the-mill sodium chloride (table salt) in salt flake form, which falls somewhere between rock salt normally used in salt grinders, and salt grains (found in everyday containers of pre-ground table salt). If you use "kosher salt" alone, please note that it is a significantly slower way to cure pork, and you might not get that characteristic pink/reddish colour that you might expect. However, I haven't done it that way, so I can't speculate on that process, but I'm sure there's information out there on the "net".
- Flavourings and other additives can be anything. Some use maple syrup, some use coffee grounds, some use spices, others use bourbon, whiskey, and other beverages to marinade/flavour the meat. However, it is possible to go too far.. I mean, you still want to taste the meat, don't you?
- You can buy pre-made curing mixes. I buy mine in "Maple Bacon Flavour" from: https://www.smokedandcured.com.au/misty-gully-maple-bacon-cure-1kg/ or you can make your own. Now please note that many curing mixes contain a small amount (usually less than 1%.. often somewhere around 0.85%) of sodium nitrite which is a salt, but a salt that is toxic in very small amounts. It's important that you measure out these cures accurately for the weight of the meat you're curing.
Method:
- Evaluate the size of your food saver roll or zip lock bags and cut your pork into nice (square) pieces that will comfortably fit inside them.
- Weigh each piece of meat, and note it down. I generally use a permanent marker and write on the bag/vacuum sealed roll.
- For each piece, accurately weigh the amount of cure needed using the following formula: Number of kilograms (Kg) x 40 grams. (If you have 2.25Kg, that's 2.25x40g = 90g)
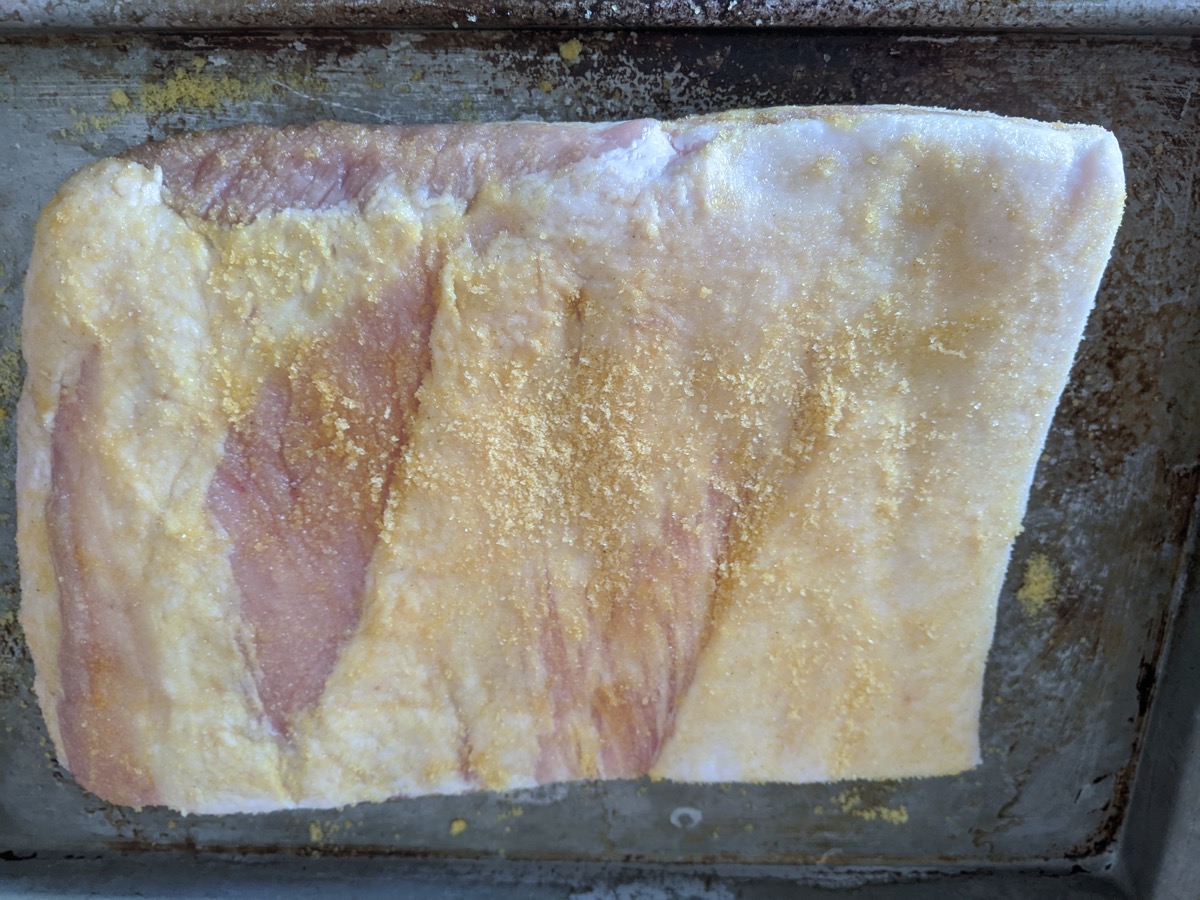
- Rub the entire surface of that particular meat with measured cure, making sure you get into all the nooks and crannies.
- Put the meat in your zip lock bag and try to squeeze out as much air as possible, seal it up fully. If you're not sure about the seal, feel free to use tape on your bag to create a stronger or secondary seal. Alternatively, vacuum seal your now coated slab of meat. Just make sure than none of the cure forms a lump where the sealer might actually want to run the seal across. I've had this issue, and had to seal it a second time in a different location.
- Put the pieces in the fridge horizontally. (I generally try to keep them all fatty side up, or all meat side up so I can keep track of which ones I have flipped over.
- For every 500g of meat, you need to cure each piece of meat in the fridge for a day. Minimum 4 days, max 8. Flip it over once a day.
- After a day or two, you'll notice a fluid building up, this is good. Do not drain it. Just keep flipping it over once a day until you've cured it for the appropriate length of time.
- When you've reached the end. Take the meat out, and wash the excess off under running water.
- Soak your meat in a fresh batch of ambient-temperature water (in a sink or container) for 1 hour to further remove any excess cure.
- Pull the meat out of the water, and pat it dry with paper towel or a clean cloth.
- Put each piece of meat uncovered in the fridge. (I use wire cooling racks for maximum airflow) Some people say you can get away with just 6 hours, but I generally prefer to leave it overnight, up to 24 hours. Leaving it uncovered, you'll notice a shiny skin developing on the meat. This is called "pellicle" and if you like smokey bacon, you really want this to develop properly. This is what the smoke flavour will attach itself to.
- Now it's time for the pre-cook.This method is for "Hot smoking", and is generally the easiest to do with the stuff people have lying around.
- If you're using an oven, then the best way to add smoke flavour is to use liquid smoke (trust me you don't want to be setting fire to wood chips inside).
- Turn the oven to 110 degrees, spray the meat with liquid smoke, and put it in when the oven is at 110 Celsius.
- You could use a meat hanger to cook the meat in the oven, but again, I just put it horizontally on the shelves with a drip tray underneath, and it works fine.
- Regularly check the internal temperature of the meat with a meat thermometer. When you get to 65 degrees Celsius, you're done! Pull it out and allow to cool.
- For better results, I recommend a smoker or charcoal barbecue, feel free to add wood chips, (some say maple or hickory woods, or some sort of fruit woods such as apple, cherry). I'm quite partial to apricot and plum wood chips myself... or if you're using natural charcoal, you can skip the chips and just use the regular smoke from a natural charcoal barbecue. I generally go for a "low and slow" temperature (somewhere around the 110-125 degrees Celsius mark).
- Again, I've never used a meat hanger for the barbecue, so I just put the meat on the grill and that works fine. I let the drips fall into the fire, it creates a lovely smokey effect. However, I do use heat deflectors (ceramic shields) to stop the barbecue from grilling, and allow a more "baking" experience to occur.
- If you use a meat thermometer you can check on it regularly until it reaches 65. If you're fortunate enough to have a barbecue controller, you can stick your food probe(s) into the respective pieces of meat, set it to 65, and it'll let you know when it's ready.
- If you're using an oven, then the best way to add smoke flavour is to use liquid smoke (trust me you don't want to be setting fire to wood chips inside).
- Once it's pre-cooked. Allow the meat to cool to a slicing-friendly temperature.
- Slice your slabs into slices. Some people like thin slivers/rashers like you get in shops to maximize the "crispiness", others prefer bacon steaks that are simply made with thicker slices. Others like the middle ground and go for chunky/rustic slices of uneven thickness.(Some crispy edges, some thick and moist pieces of bacon too). In any case, your bacon is going to be better than most store bought varieties.
- Once sliced, feel free to cook some as a test sample (we can't skip this critical step in our home). As for the rest, we generally lay them out flat in vacuum packs, and seal them up for quick defrosting and longer term storage.
- Enjoy your home made bacon. Feel free to add flavourings! There are tons of sites on the Internet with suggestions.
Here's some images from my procedure:


I'll add more photos when I make something photogenic enough to be interesting. :~)
