
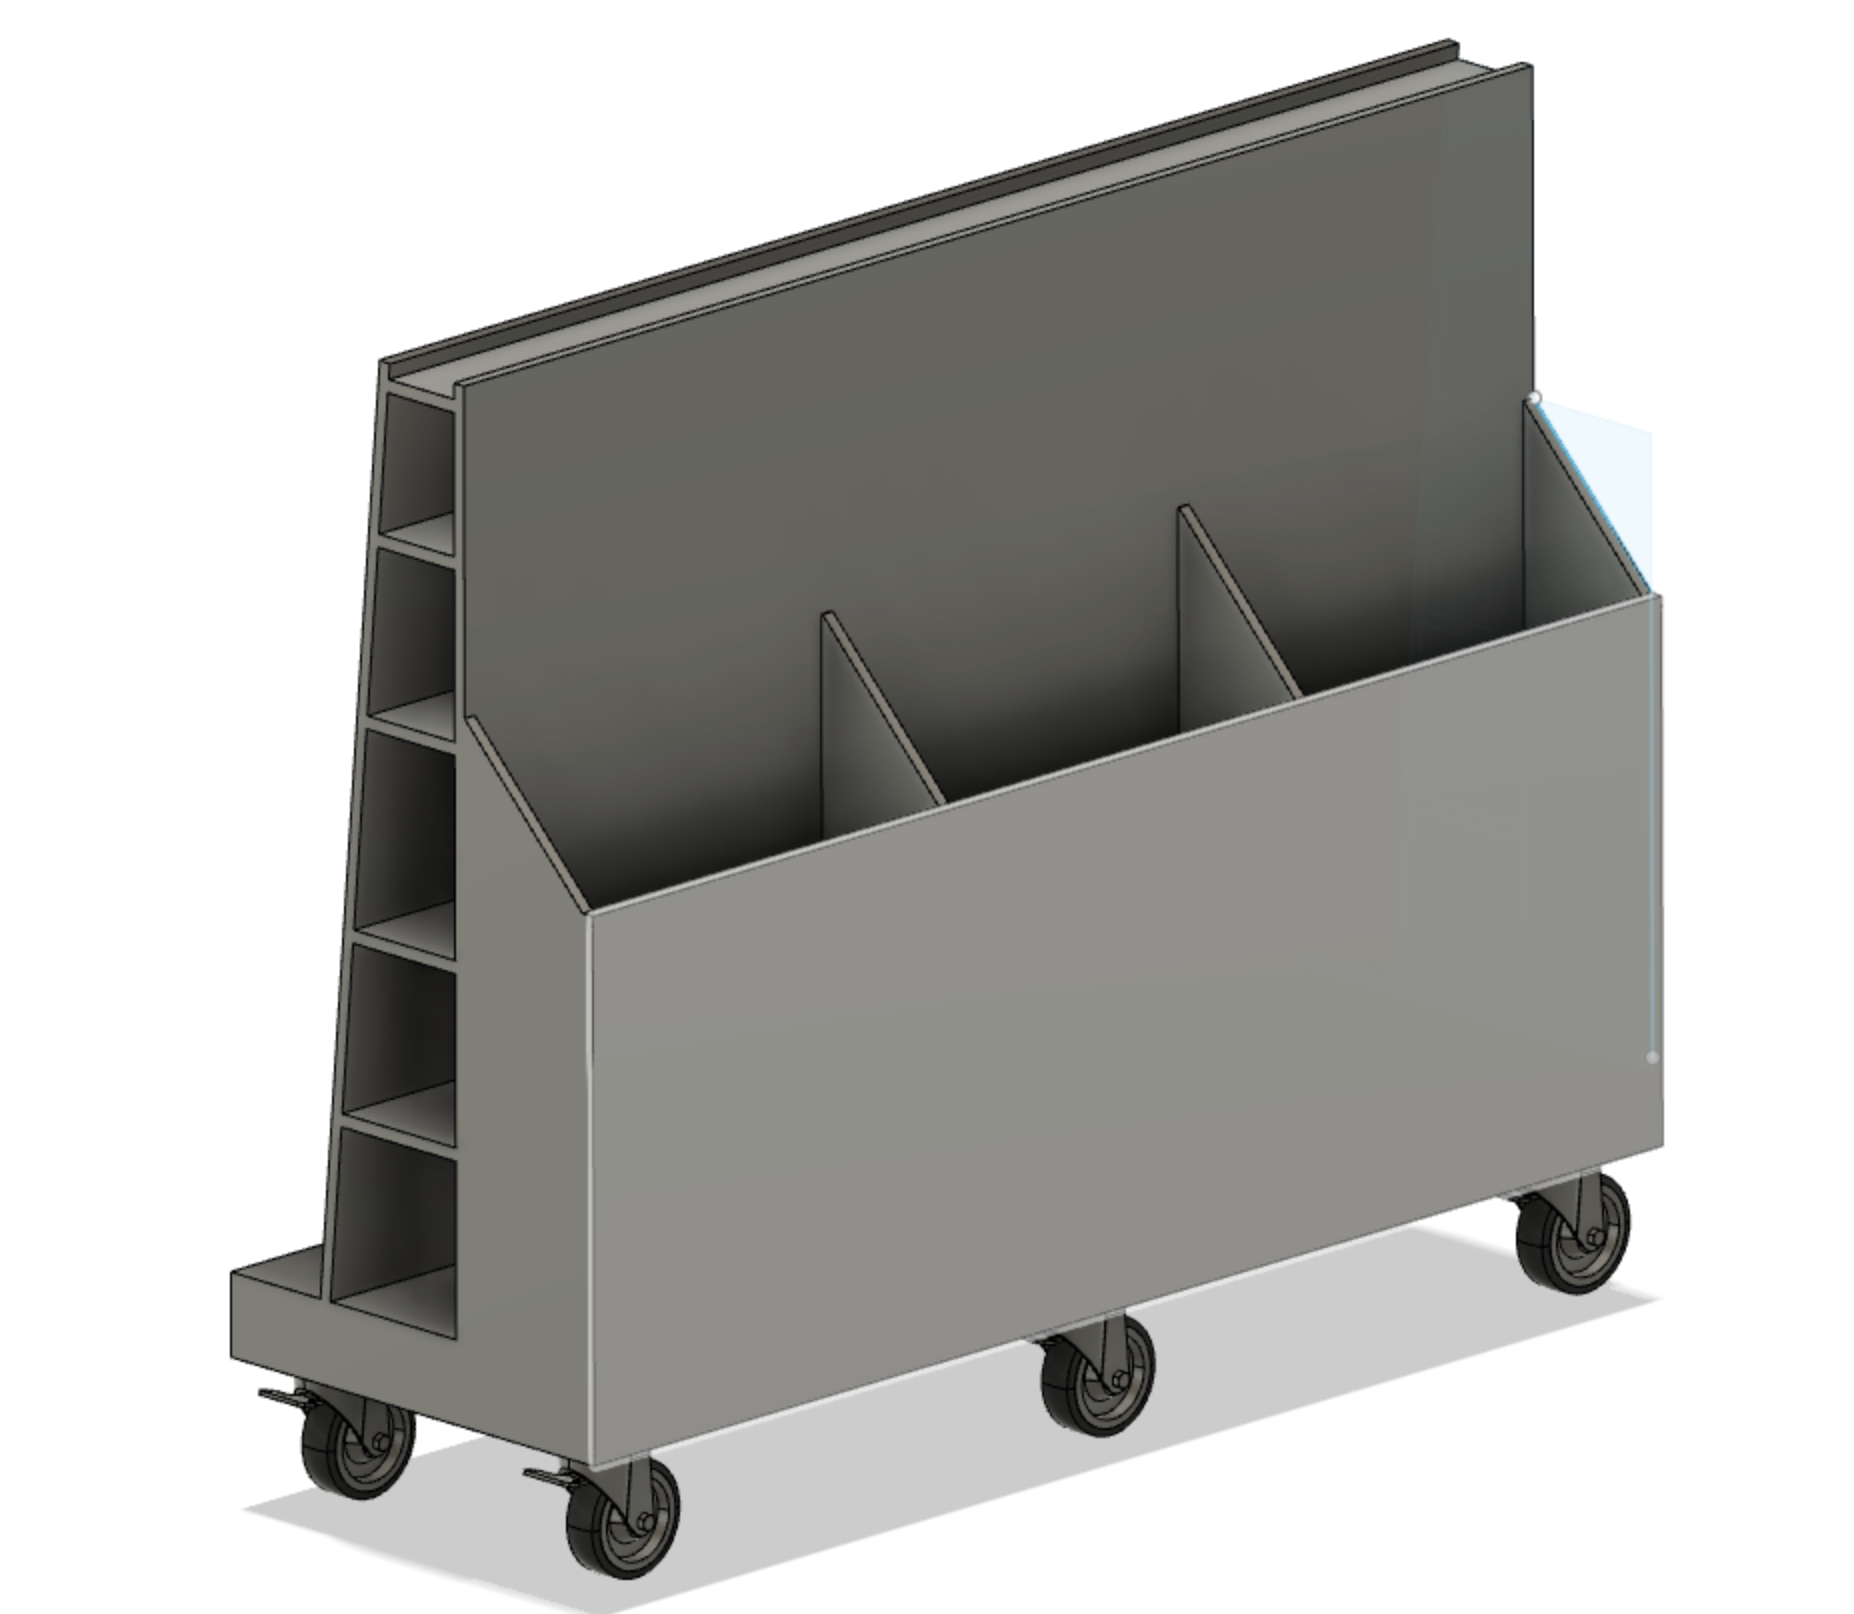
CAD drawing of my trolley
What started out as mess-induced web browsing...
We've all been there. You buy some wood, you build your projects, and you have bits left over. A few humble projects later, and you find that bits of wood are pretty much everywhere. Sure you have them tucked in corners, leaning up against that shelf that is "out of the way".. but now everything on that shelf is prohibitively difficult to get to... so you improvise, and make more scrap.. exacerbating the problem.
It was about the time that I effectively had what looked to be a bonfire pile in the middle of the workshop that I finally broke down from my pre-fire tribal man cave ways and realised that it wasn't helping me... but hindering me.
So it was finally time to do something about it. Get that wood off the floor (and off everything else) and start thinking of way to make sense of it all, make it mobile, and tidy.
Now my first thoughts were to build some sort of shelf in the rafters, but after the fun and games of my fall from a ladder, and the fact that I work with some seriously heavy pieces of wood... putting it all overhead seemed almost dangerously stupid.
My second thought was to use industrial shelving along the walls.. but I didn't have enough room for that...
So I did a bit of web browsing and came across this wood trolley:
It was about the time that I effectively had what looked to be a bonfire pile in the middle of the workshop that I finally broke down from my pre-fire tribal man cave ways and realised that it wasn't helping me... but hindering me.
So it was finally time to do something about it. Get that wood off the floor (and off everything else) and start thinking of way to make sense of it all, make it mobile, and tidy.
Enter the Wood Trolley...
Now my first thoughts were to build some sort of shelf in the rafters, but after the fun and games of my fall from a ladder, and the fact that I work with some seriously heavy pieces of wood... putting it all overhead seemed almost dangerously stupid.
My second thought was to use industrial shelving along the walls.. but I didn't have enough room for that...
So I did a bit of web browsing and came across this wood trolley:

This is the image that inspired me. Note that it has a sloped side for large plywood/MDF sheets, a central section for long thin beams... or pipe clamps, or paint roller extension handles, garden sleepers, or long spirit levels. Anything that's long and thin. Then it has a variety of bins to store shorter lengths of wood. All on a mobile base so you CAN get to whatever is behind it.
Adjusting it to my needs
The truth is that a trolley the full 2400mm/8ft length was too big for my shop. So I cut it down to 1.8m. Many variations on this trolley online feature wider bases, and differing allocations to the bins, the central shelves, and the sheet storage side.
I chose a 685mm wide base for the simple reason that I re-purposed my former planing jig to be the base. I reinforced it a lot with four full-1.8m long 45mm x 90mm struts I had from a previous project. Then reinforced further with a ridiculous amount of cross beams, all glued and firmly screwed with 100mm screws.
Using pocket holes and copious amounts of glue, I ran 150 screws into the bottom edge of the vertical sheet of 17mm ply to attach it to the base. Reinforced and propped up by about another 60 pocket screws joining the four bin sides/dividers to both the base, and vertical sheet.
I intentionally left the front of the bins off, for easier access down the track.
I bevelled the edge of a second piece of plywood (to compensate for the leaning side of the central shelving column) so that it was flush with the base. I then played around with the final placement so I could decide how much of the central shelving, and how much sheet storage I needed.
I then built two shelves, each with one bevelled edge for the leaning side. One formed the top shelf, another formed the lowest shelf.
Using the sloped sheet as a guide (but leaving it unattached for easier access), I made all the shelves for their corresponding widths, and attached them to the vertical panel first.
I attached glued, and screwed reinforcing wood for the underside of each shelf, making the joins to each side sheet of plywood considerably stronger. Once they were attached to the vertical sheet. I glued and screwed the sloping sheet of ply to form the second side. Since I couldn't possibly screw the wood in from the inside, I simply glued each shelf, and then marked where the sheet of wood lined up with the shelves, and drilled screws through the sloping sheet into the shelves. The sloping sheet was also glued and pocket screwed to the base.

The sloping side sheet of ply has not been attached yet, but I'm clamping reinforcing strips of wood to each shelf (tapered to the angle of the sheet).

Here I'm using a lot of clamps to press both side sheets of plywood to the central shelves. There are more further down on the edges, and I'm even leaning heavy sheets of wood in the middle where clamps aren't going to reach.
Once the central section is done, it's time for tidying up....
I used pocket holes to attach the front sheet to my bins. Reaching into them from the inside may have made my trolley look better, but it was quite awkward.
Remember all those pocket holes? Well there were hundreds and I really wanted everything to be tidy. So I plugged and sealed all of them. That took me the better part of an afternoon.
Then it was simply a matter of screwing on a board to stop the sloping sheets from sliding out on the base, adding wheels, and putting all the wood in and on it.
I say that it should have been simple, but a few things didn't quite line up, so I had to trim a few things, and the plywood needed a huge amount of sanding. In the end, I found my re-purposed jig-now-trolley base had been marred, drilled, and generally abused in their previous life, so I found a thin sheet of plywood to veneer the ends.
So how does it go?
There were a few things that didn't quite work as planned along the way:
But how does it handle wood load? I handles it beautifully. I've put five entire Ironbark sleepers in the middle shelves (300Kg minimum there), a surprising amount of 50mm x 90mm (close-ish to "two by fours" in between them. 10 full sheets of 17mm ply with some cabinetry off-cuts like timber bench tops and melamine panels, and a lot of dense heavy timbers like Red Gum, Jarrah, and miscellaneous hardwoods.. perhaps enough to make a decent table or two.
However, given the (insane) number of reinforcements, the 6x 450Kg rated castors, several litres of wood glue, about 20 packs of epoxy, 500 pocket screws, and a Partridge in a pear tree later.. you'd expect a decent load tolerance.
Yet I then learned something important...
When you have a couple of tons of wood on a trolley, it really is like pushing two cars at once, or a heavier 4WD with all the steering capability of your average shopping trolley. Not only is that very difficult, it gets dangerous to move on anything but a smooth and level surface.
So for the past 6 months or so, I've been using my wood up, and now it is very manageable to move. However, the load-to-moveability compromise will vary, depending on your strength, your wood, and your need to move it. As such, I would recommend making multiple modest-sized trolleys over making bigger ones.
There you have it, another project done, the obstacles found (and for the most part, overcome), and I'm one step closer to a cleaner, functional, and enjoyable workshop.
Remember all those pocket holes? Well there were hundreds and I really wanted everything to be tidy. So I plugged and sealed all of them. That took me the better part of an afternoon.
Then it was simply a matter of screwing on a board to stop the sloping sheets from sliding out on the base, adding wheels, and putting all the wood in and on it.
I say that it should have been simple, but a few things didn't quite line up, so I had to trim a few things, and the plywood needed a huge amount of sanding. In the end, I found my re-purposed jig-now-trolley base had been marred, drilled, and generally abused in their previous life, so I found a thin sheet of plywood to veneer the ends.
So how does it go?
- Firstly, the difference it has made to my shop is significant. Things are just so much tidier. By putting the smaller pieces to the front, and larger pieces to the back, I can see which pieces might suit my immediate needs at a glance. I've also gotten into the habit of writing dimensions on visible edges so I know exactly how big each piece is. The vast majority of my wood storage needs are handled by the trolley.
- If it is relatively empty, I can use the sloped side to break down full ply sheets with my circular saw and straight edges clamped on. (I highly recommend putting some scrap/spoil board behind whatever you're cutting to ensure you don't damage the trolley. (I'm thinking about building an almost vertical CNC router and mounting it to this side for easy movement/storage.. but that'll have to wait).
- It's nice to be able to move the trolley around, move behind it, or use it in general to move awkward ply sheets from the delivery truck to my workshop.
There were a few things that didn't quite work as planned along the way:
- The base wasn't straight, so the wheels didn't exactly sit flush to the ground, and this caused some rocking. Interestingly, that wasn't the only problem. You see, someone had "helpfully" put a 125mm castor in amongst the 150mm models at the shop, so I had three 150mm wheels, and one 125mm. Unfortunately, I didn't notice until it was attached... as an interim measure, I added a 25mm piece of wood block to put between the smaller wheel and frame.
- Once I got the right wheels on, I decided to distribute the load some more, and added two more castors to the base to stop any potential sagging in the middle.
- Yet again the base wasn't perfectly flat, so I created some shims (thin pieces of wood) and put them between the wheel and base to lower any raised castors.
But how does it handle wood load? I handles it beautifully. I've put five entire Ironbark sleepers in the middle shelves (300Kg minimum there), a surprising amount of 50mm x 90mm (close-ish to "two by fours" in between them. 10 full sheets of 17mm ply with some cabinetry off-cuts like timber bench tops and melamine panels, and a lot of dense heavy timbers like Red Gum, Jarrah, and miscellaneous hardwoods.. perhaps enough to make a decent table or two.
However, given the (insane) number of reinforcements, the 6x 450Kg rated castors, several litres of wood glue, about 20 packs of epoxy, 500 pocket screws, and a Partridge in a pear tree later.. you'd expect a decent load tolerance.
Yet I then learned something important...
When you have a couple of tons of wood on a trolley, it really is like pushing two cars at once, or a heavier 4WD with all the steering capability of your average shopping trolley. Not only is that very difficult, it gets dangerous to move on anything but a smooth and level surface.
So for the past 6 months or so, I've been using my wood up, and now it is very manageable to move. However, the load-to-moveability compromise will vary, depending on your strength, your wood, and your need to move it. As such, I would recommend making multiple modest-sized trolleys over making bigger ones.
There you have it, another project done, the obstacles found (and for the most part, overcome), and I'm one step closer to a cleaner, functional, and enjoyable workshop.
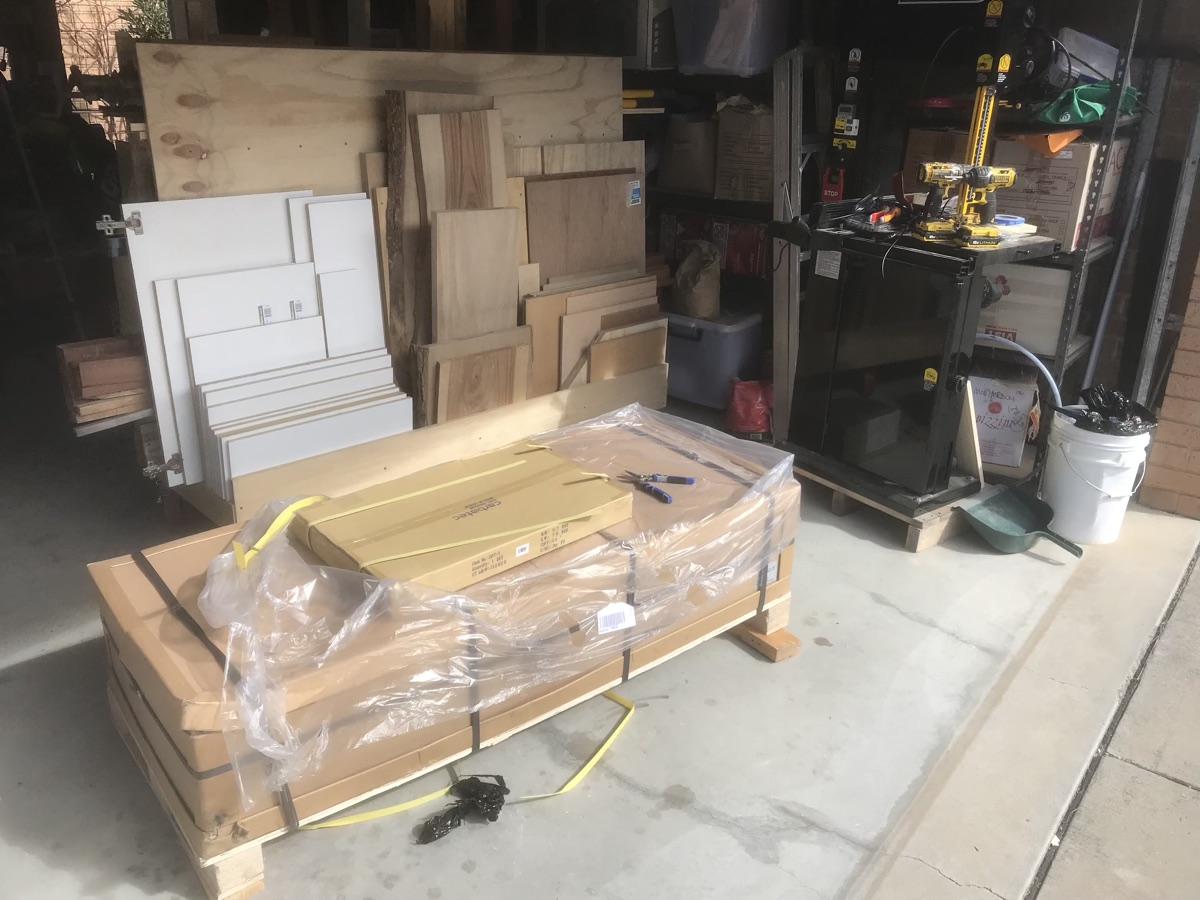
Not my best photo, but you can see the completed (and filled) trolley in the background. In case you're wondering, the coffin like box is my new drill press.
Notice how putting the biggest sheets at the back, and the smaller sheets at the front, makes everything easy to reach (and see).
I'd also recommend that you measure and write the dimensions for each piece on the edge... just so you know for sure whether a piece is big enough before you completely destroy any order you may have fought hard to obtain.
Here is some more images.
Here is a few extra CAD shots that may help and/or inspire you.
CAD screen shot, bin side forward.


