
Before Apple shrunk the humble Mac Mini with the latest M4 series, Apple hadn't changed the dimensions of the humble Mini for well over a decade. But don't let that fool you, that consistent shell hid a lot of changes over time.
The Minis released in 2012 and earlier had hard disks and RAM that were user-upgradeable, 2014 models locked the RAM down leaving the hard disk as the only upgradeable part. 2018 models removed even that much.
The "Apple Silicon" chips of the M1, M2, and M3 parlance, had the RAM embedded in the chip and the hard disk SSD was soldered onto the circuit board. This meant you couldn't make any changes after purchase. However, the M4 series has seen the return of an Apple proprietary SSD socket, so repairs/replacements are possible.. but that doesn't help my poor little M2 Pro.
In any case, I didn't think to upgrade the network in my M2 Mac Mini to 10Gb because my network at the time wasn't that fast... and once I bought my machine the specs of the hardware inside my Mini were locked in place forever.The rise of the external thunderbolt or USB-C docks, hubs, and drive bays.
Even if you're in the process of choosing a Mac, and all the options that are open to you at that time, it's often more cost-effective to simply add an external hard disk, or disk enclosure, and put a standard (non proprietary) SSD or rotation drive in (depending on whether you like performance, or sheer storage volume).
The good thing is, you can do that at any time, even long after you've bought your Mac Mini.
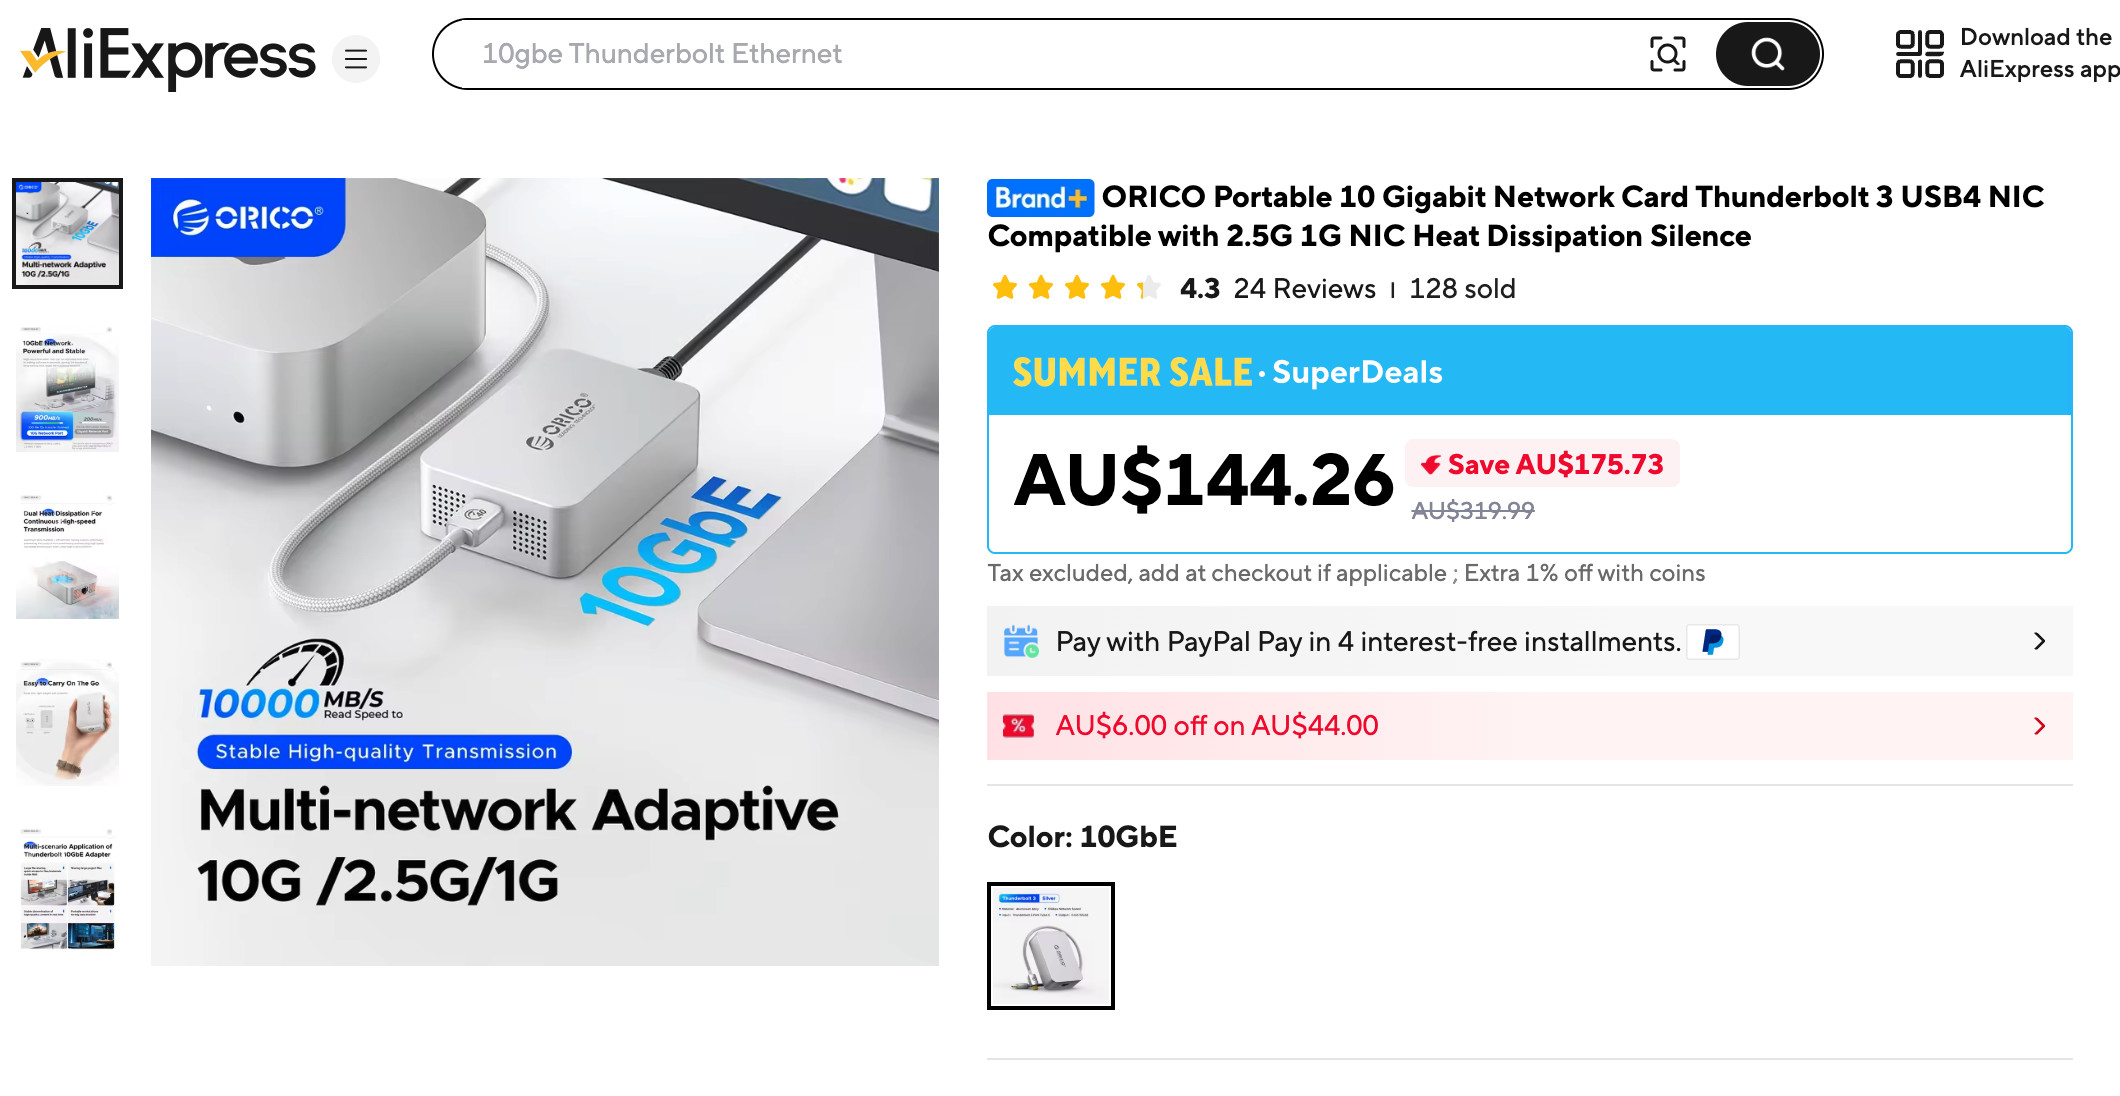
I looked at buying a dock with a 10GbE ethernet port in it.. but they were worth almost as much as my M2 Mac Mini... So I looked at a dedicated USB-C 10GbE external network adaptor.
In the end, I chose this one:
The unexpected challenge...
Now, I don't want to say that this external network adaptor didn't work, because it absolutely does, and reliably to spec too (well... within real world tolerances, at least). However, as soon as I plugged it in, a tiny fan whirred into life and was loud enough for me to be annoyed by it.
I opened it up, and saw why. A tiny fan with a miniscule heat sink, that on it's best day, might have cost a dollar.... strapped to a high-performance network chip, and a USB/Thunderbolt translation chip beside it.
Condensing all that tech into a small card, then sticking two heat-producing chips side-by-side, then asking a 40mm fan to cool the pitifully tiny 10g of aluminium that made up the entire heatsink... that poor fan had to spin fast, and fast always = noisy.
Ok, for someone with a laptop, transferring files with this external adaptor "from time to time", that noise wouldn't be an issue. However, if that fan is spinning 24/7 on a desktop, you know the fan will wear out, and the chips will be running hot (not good for longevity).
So I did what any crazy tight-fisted 3D printer weilding nut job would do. Use some old computer hardware that I had laying about to make my own, custom cooling system and put it in what I hope to be an custom-designed, aesthetically pleasing case.
So I used:
- A comparatively enormous, 120mm fan sized CPU heat sink.
- A cheap fan speed controller with thermostat.
- A putty-like thermally-conductive sheet by Thermal Grizzly. My version was a 3mm thick edition of the "Minus Pad Extreme".
- A Noctua 5V 120mm fan NF-F12 (I had laying about)
- A file to grind down the excess aluminium of the heat sink bracket to ensure none of the sockets sticking up from the 10Gb board got in the way.
- 2 custom printed brackets, which threaded through the heat pipes of the heat sink, but both screwed to the base of the heat sink using m3 machine screws and nuts.
- Custom 3D printed enclosure to support the circuit board, mount and house the entire heatsink. All sanded down and spray painted to match the shape and appearance of the M2 Mac Mini.

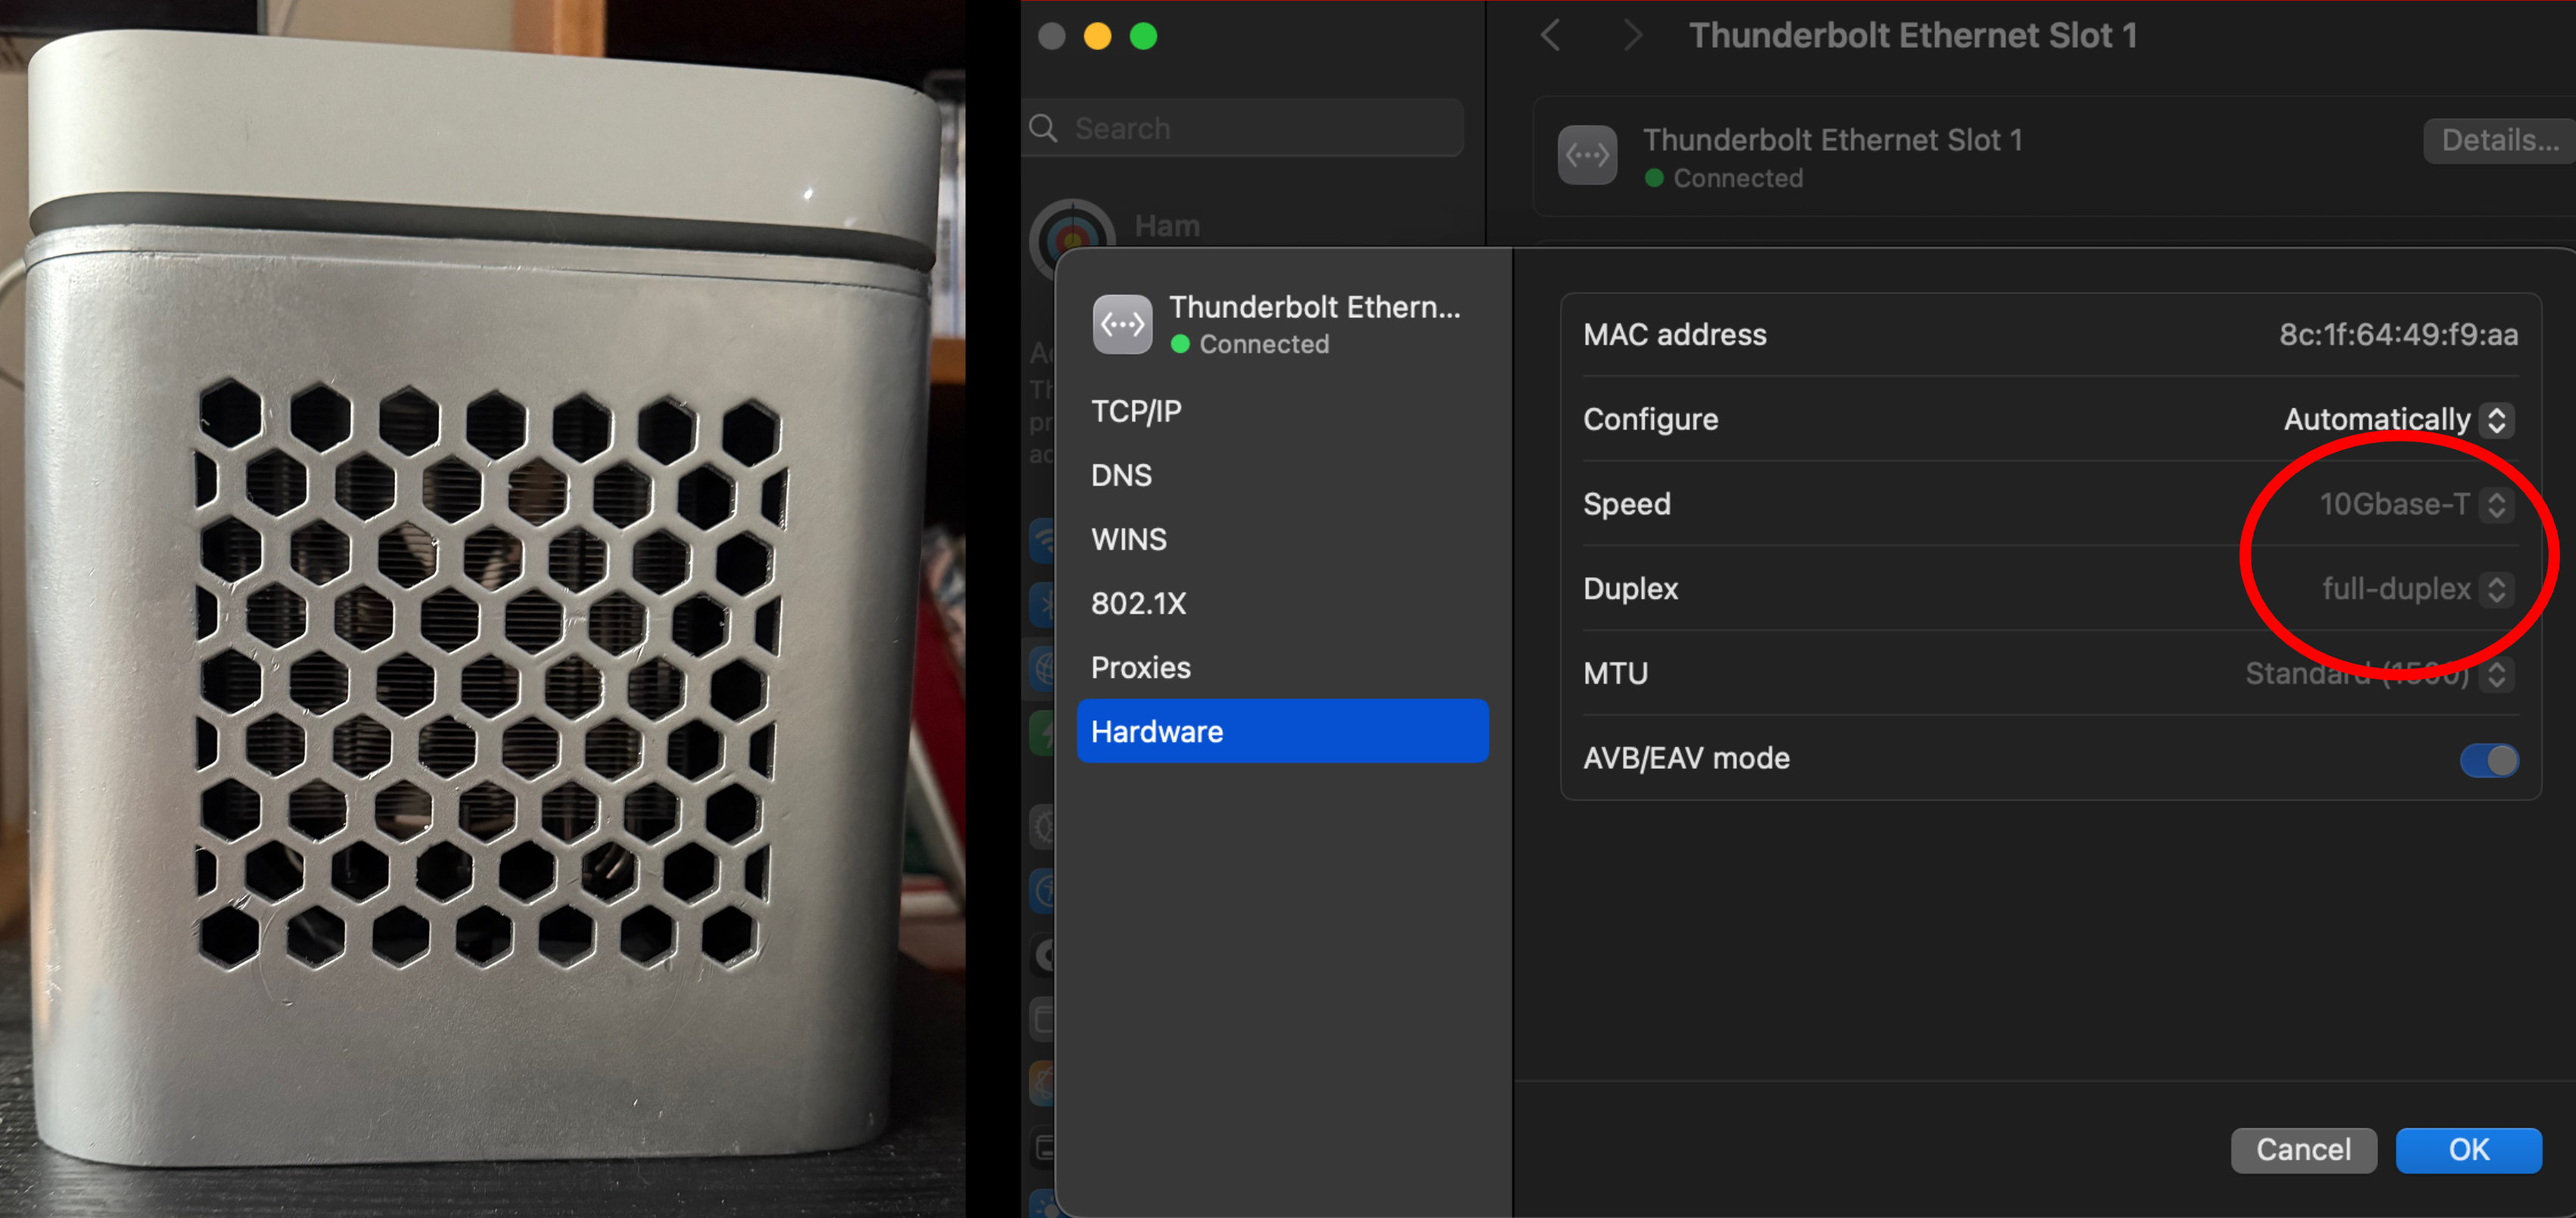
Left: Here is the enclosure, partially assembled. I obviously need to add the fan and controller and build the lid, but the heat sink is sitting stably on external network interfaces circuit board.
Right: I intended to have a lid at this point, but it was still printing... so to give my online friends a sense of what it'll look like with the Mac Mini on top (actually important for the Bluetooth keyboard connectivity) I just sat it on the heat sink.
Far right: You can see just how tiny the original case for this external network adaptor is by comparison. Now, imagine a fan roughly a third of that tiny case's length for comparative scale. All this for a single noisy fan... yes, I know! :~)
The finished result!
Ok, there's some stuff in here that I'd would do differently, if I had to do it again....
I'd have redesigned the case so I could put the lid inside the sides of the enclosure but I didn't have the height clearance to do that once this had been printed. This would just give a cleaner look. I'd also have built in a thermostat mount point, but instead, I've just hot glued it in the bottom. Finally, I'd probably have put a smaller heat sink in, just so it's not so overwhelmingly large. This thing doesn't even need the fan to spin most of the time, so the fan might well be... redundant.
That said, the lid is barely visible from a metre away, the all-high matriarch of the household has given approval to the aesthetics, the whole unit is now silent, even during summer, and the sheer amount of difference having 10Gb over 1Gb when streaming over the internet, backing up the hard disk to our local server, and updating the OS at the same time, is amazing. It makes this machine work much more efficiently with distributed resources... which is a lot of the time.
For those wondering why I don't just use a WiFi "mesh" network. Our property is long and skinny, and unfortunately, we live at one end and the internet port's at the other. WiFi, no matter how fast your router is, always slows down as distance increases. Also, I've yet to see any real-world tests of a WiFi setup get speeds upwards of 6Gb/s and even that was not reliable. I like cables, they work for me and I don't regret building this setup... even if it wasn't as straightforward as I originally hoped.
All the best in your crazy IT projects!
Ham